Everyday Makeup Staples
Hi cuties,
Today I'm going to talk about my everyday makeup staples. These are some of the products I've been using every day on my face and most of these are HG worthy!
Urban Decay Eyeshadow Primer Potion in Original
This is probably my holy grail primer. I've used the Too Faced version which was comparable, but I find UDPP makes my eyeshadows more vibrant and the formula is less oily. I have to use this every time I use eyeshadow or liner on my eye. It makes everything stay put on my eyes all day and night.
Maybelline Lash Sensational Mascara/The Falsies Volume Mascara
I only use one mascara at a time, and therefore I was using Lash Sensational at the time, which was a nice mascara. It lengthened and fanned out my lashes well. My HG is The Falsies. It makes my lashes look full, long, and keeps them curled.
Maybelline Instant Age Rewind Eraser Dark Circles in Fair
Everyone and their moms love this concealer. I like this for concealing but most of all, highlighting my face. It's a light formula so it does not cake up, however it does not have the fullest coverage out there so keep that in mind. I love using this for light makeup days as well.
The Face Shop Lovely me:ex Design My Eyebow in 03 Black Brown
I really like this eyebrow pencil and I go back to it time and time again. It formula is not too soft but not too hard so it's easy to fill in my brows to make them full and as light or dark as I want. It's a twist-up pencil with an angle so it's easy to use and it comes with a spooly brush on the end for blending and combing.
Physicians Formula Eye Booster Liquid Eyeliner in Ultra Black
This is my favourite drugstore liquid liner because it's super black and it has a brush tip. It's the most similar to my favourite DollyWink liquid eyeliner for a slightly cheaper price. I can't tell you if the lash boosting claim actually works though.
The Balm Bahama Mama Bronzer
I love this brozer because it's a neutral to cool toned brown unlike most bronzers which makes it ideal for cool toned people like me and also doubles up well for contour.
The Balm Mary-Lou Manizer
This is my favourite highlighter that I own. It's a champagne colour that makes you glow like it's nobodies business. I love this especially for a nose highlight. The product is not glittery, slightly shimmery but overall just gives the perfect glow to the skin. It's worth the money.
Labels: bronzer, cosmetics, eyeliner, favourites, highlighter, makeup, mascara, physicians formula, primer
Etude House Precious Mineral Any Cushion Review
Hey cutie!
So I'm back a year later with another cushion review. This time, I'll be talking about Etude House's Precious Mineral Any Cushion. I had two refills of this, and I'm just finishing my last one so I think I have a good idea of what I want to say in this review.
First, I want to say that the packaging is much bulkier in comparison to my Innisfree Water Glow Cushion. If I can remember correctly, I've been told that Etude House cushions fit into other brands under Amore Pacfic such as IOPE, Hera, and so on. Innisfree however, does not, and their sizes are different than other cushions. If I had to choose, I do prefer the Innisfree compact better because it's a little slimmer and it's flat top allows you to stack it with other products with ease. Etude House has a curved top which makes it impractical to store sometimes.
Second, let's compare the sponge. I think the key to a good cushion is not only the formula but also the sponge. Etude House's sponge is very airy and has a bit of a thickness to it which is ideal for cushions. Innisfree's sponge is slightly less thick, but both sponge's texture are similar. For this reason, I'll say Etude House wins this portion.
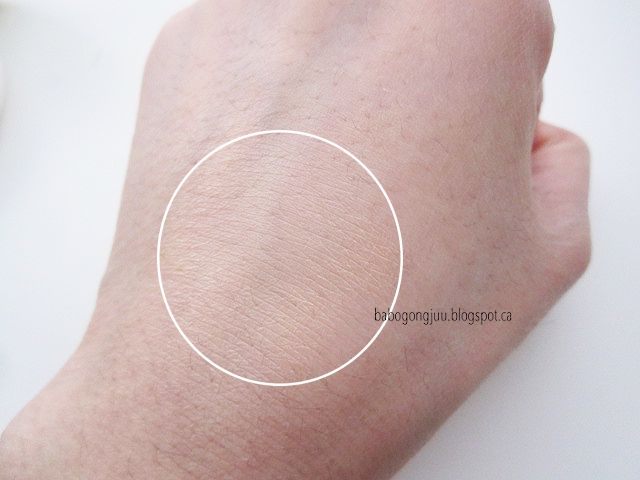
I got this cushion in the shade W24 Honey Beige which is their darkest shade but I find it is super warm against my skin. You can clearly see the difference in colour from the picture. The texture of this cushion is a little thicker than the Innisfree Water Glow. If you're tried the Precious Mineral BB Cream, it's the same product, just in a cushion form. For both the BB cream and cushion version, I found it is heavier and a little cakey on my dry skin. It has never been my favourite formula.

The coverage of the cushion is about a light-medium to buildable medium in my opinion. It evened out my skin tone and reduced the redness of my cheeks and also brightened my face despite the yellowness of it. There is a slight perfume scent to it but it does not last on the face. I'd say this lasts about 4 hours into the day but anything after that will soon start to fade. The issue I have with this cushion is how cakey it tends to make my face look up close and it sometimes creases in my worry lines
(I don't set my cushions with powder). For this reason, I try to apply a thin layer upon application.
Overall, this is not my favourite cushion although I know a lot of people do enjoy it. I much prefer my Innisfree Water Glow but this is a "slightly"
(not by much) cheaper alternative. If you have oily to combination skin, maybe this will work out much better for you.
Rating: ★★★☆☆ 3/5
Labels: cosmetics, cushion, etude house, foundation, korean, makeup, review
[Part 1] Maybelline Dream Lumi Touch Highlighting Concealer in Ivory Review
Hello cutieeeeee,
I'm gonna do a two-part concealer review on the Maybelline Dream Lumi and Fit Me concealers! First I'll be reviewing the Dream Lumi, then the Fit Me, and do a comparison at the end :)
*By the way, this has been in my drafts for a while so excuse my still-blonde pictures!
So this concealer is supposed to highlight and brighten your face so it's really great under your eyes and bridge of your nose; anywhere you want to highlight. The tip has a brush applicator which makes it easy to apply on your face and even blend out if you don't dispense too much product at once. I usually just use my fingers or my foundation brush though.
I got the lightest colour Ivory because I wanted the maximum highlight I could possible get. My skin is relatively light so it actually matched well. It blends out okay and you really only need a little bit.
Rating: ★★★★☆ 4/5
Overall I like this product for the brightening aspect of it. The only thing I don't like is how pricey it can be for such little product and how it can get a little cakey if you add too much. Other than that, it's a pretty decent highlighting concealer but don't expect to cover blemishes with this!
Labels: concealer, cosmetics, makeup, maybelline, review
[Part 2] Maybelline Fit Me Concealer in 10 Light Review
Hello again, cuties!
This is the second part to my concealer review. I'll be talking about the Fit Me concealer by Maybelline, and then do a comparison at the end!
*By the way, this has been in my drafts for a while so excuse my still-blonde pictures!
This concealer didn't come with lots of packaging which I liked because that's just less junk for me to throw out. There's tape around the seal to insure it hasn't been opened yet. I got the shade 10 Light which is more yellow toned. (I should have picked Fair which is more pink!)
Despite me getting the pinker toned shade, this concealer still managed to look yellow on me! It blended into my skin okay but I was hoping for something more cool toned.
I got the colours mixed up and should've gotten Fair, which is why this was so yellow on me. My bad!
This concealer is best for blemishes and covering dark circles, but probably won't do much for you in terms of brightening or highlighting. It can cover pimples if you apply two coats. I just did one coat to show you the coverage.
Rating: ★★★★☆ 4/5
Overall this is a good concealer that many makeup junkies enjoy. It has good coverage and doesn't cake under the eyes too much. Personally, I like brightening concealers a lot more as I don't have many blemishes to cover.
Comparison
So which one is better? They're both good!... For different reasons. Fit Me is good to cover blemishes while Dream Lumi gives a really nice highlighting effect. Here they are under each of my eye in the same lighting. You can really see how bright the Dream Lumi is in direct sunlight.
Labels: concealer, cosmetics, makeup, maybelline, review
The Lipstick Tag
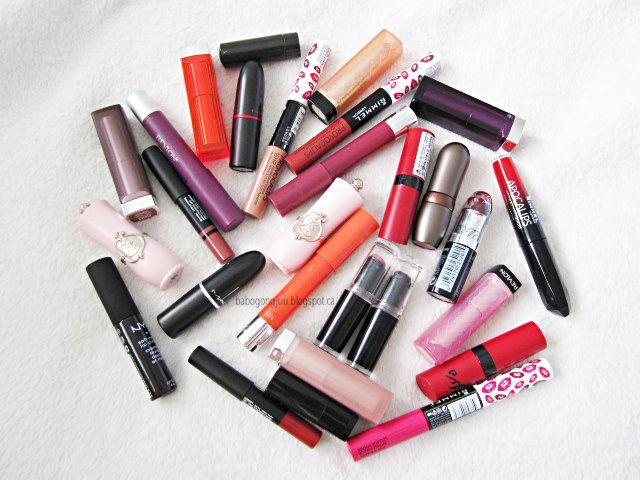
I've been really into lipsticks lately so I thought doing this tag would be fun :) My collection is only in it's baby stage of growing so I think it'll be fun to re-do this in a year or two from now! There's apparently a blog version of this tag and a Youtube version. I'm going to do both version's questions :)
How many lipsticks do you own?
30 but I lost one. (Not including liquid stains and glosses!)
What was your first ever lipstick?
I believe it's a wine coloured Lancome lipstick that belonged to my mom but she never used it. I took it and wore it maybe twice in my life. I still remember the old lady scent it has, haha.
What is your favourite brand for lipstick?
Looking at my collection, I'd have to say Maybelline. I don't own many high end lipsticks but when it comes to drugstore, Maybelline is always on point with their lipsticks.
What is your most worn lipstick?
Maybelline Color Sensational The Buffs in Truffle Tease. It's a really good brown nude on me which is so easy to throw on and goes with everything.
What is your favourite finish?
Matte! I love matte lipsticks because they look so good on the lips and are easier to manage than glossy ones. They don't tend to get everywhere like on your face and teeth.
What was the last lipstick you bought?
Milani Sangria. It's a dupe or MAC's Rebel and I love it!
How many lip products do you currently have in your bag? (including glosses and balms)
I currently have 4 lip products in my backpack. There use to be way more but I recently cleaned it out, phew.
What lipstick do your use to rock a red lip?
Rimmel Lasting Finish Matte by Kate Moss in 111 Kiss of Life. It's such a good matte cool toned red that goes well with my skin tone. I've gotten lots of compliments while wearing this shade!
How do you store your lipsticks?
I usually just throw them in a bunch of makeup bags that I have on my table which carry the rest of my makeup collection. I don't have special containers or shelves to store my makeup though I'm starting to think I should.
What lip products are you currently lusting after?
Kat Von D Studded Kiss lipstick in Lolita and Lime Crime Velvatine in Cashmere
(however I refuse to buy Lime Crime! I just want a dupe of the colour).
Favourite balm/treatment?
I have two because both together have helped my lips heal up super well. Carmex and Blistex Lip Medex.
Best eye-catching red?
Probably my Rimmel 111 again. All my other reds are pretty dark/wine coloured which isn't as eye-catching in my opinion.
Best luxury & best drugstore?
I don't own any "luxury" brands and the closest one would be MAC's Cyber&Viva Glam2. Best drugstore goes to any of the Maybelline Color Sensations!
Best MAC lipstick?
Cyber lol, though I currently only own two MAC lipsticks.
The most disappointing?
Rimmel Lasting Finish Matte by Kate Moss in 102. It's such a surprise to me that I love 111 so much but 102 is a total let down! Not only is the colour horrible on me, but the formula on this particular one is so bad! It settles into lip lines and makes dead skin so visible.
Liner - yes or no?
Yes but no? I know the importance of lip liner and I do use it when I'm wearing a bright red but I lack lip liners for every other colour so I don't use one as much as I'd like to. I think I should just invest in one of those clear ones.
Best gloss?
None. I hate gloss!
Something extra!
Here's my three vampy shades! Left to right: NYX Soft Matte Lip Cream in Transylvania, Wet n Wild's Vamp It Up, MAC's Cyber. If you're looking to get this colour, here's the differences. The NYX one is the most matte but also the lightest of the three. The Wet n Wild one is super dark and even more opaque than MAC's but it also goes on a little patchy on your lips. MAC's Cyber is a satin finish and glides on really nicely but is the medium shade of the three.
Labels: lipstick, mac, makeup, maybelline, nyx, revlon, rimmel, tag, wet n wild
Rimmel Lasting Finish Matte Lipstick By Kate Moss (102) Review
Hello cuties,
So I went ahead and got another Rimmel Kate Moss lipstick because I adored my 111 so much. I was debating about this colour and another more paler version but my brother picked this one so I went with it. I also picked the same matte finish.
So this is the colour. It's a bright coral-pink which looked very lovely when I swatched it on my hand, but as soon as I put it on my lips, I instantly knew it was the wrong shade for me and I regret not getting the paler shade. The colour just did not match my skin tone. I think this colour would work very will with someone who had a pink undertone but it was definitely clashing with my yellower undertone. Sometimes when I dab a little bit of the colour on the inside of my lips, I can make it work, but I definitely can't just wear it full on my lips.
Although the finish is the same as the 111 that I love so much, this one was horrible to apply on my lips! It just accentuated the cracks of my lips and made my lips look so terribly chapped. Even when I've fully exfoliated my lips to be baby butt smooth, this lipstick has some kind of super power to make my lips still look chapped and gross! Maybe it's just this colour that does it because I have no problems with my red 111.
Rating: ★★☆☆☆ 2/5
Anyway, this was a very big disappointment. The colour choice isn't their fault, but the formula is! I just don't understand why 111 and 102 have such different outcomes when they're both from the same matte lipstick line.
Labels: cosmetics, lipstick, makeup, review, rimmel
Beauty Blender Review
I can't seem to sleep right now, so you guys are gonna get a mini review right now. I've been really vocal about my recent purchase of the Beauty Blender and that's because I'm totally in love with this thing. That's the review in a nutshell, but let me go through the pros and cons.
So I have to admit, I was pretty skeptical about this when it first got really popular amongst the beauty community. It seemed like just an egg shaped sponge, big whoop. It wasn't until I tried my Innisfree cusion foundation that I started to realize that maybe this thing wasn't such BS after all. The sponge on the cushion foundation felt different from regular makeup sponges and it made makeup application really easy and smooth. That's when my curiosity started to get to me.
When I got the opportunity to purchase something at Sephora, I ran straight to the Beauty Blender because I was so ready to see what the hype was all about... and let me tell you, the hype is so real it hurts.
This little guy literally does wonders to my face. The first time I used it, I saw the hype. It literally made my foundation look flawless like it never has before. Also, it did wonders to my dry skin and kept it from looking cakey even hours after application. It wasn't until my friend asked what I used on my face because my makeup was looking incredible that day (I was only using concealer and highlighter with the Beauty Blender) and said my face was extra dewy, that I knew this thing really was doing a lot for me. I've never heard a single compliment on my face makeup until I used this thing so I think it speaks for itself.
You have to use this wet to get the full affects of what it can really do. I like that it adds extra dewiness and hydration to my face. Because it's a sponge, it does sheer out your foundation a tiny bit, but I still managed a medium coverage with one layer, so don't think it'll make your foundation totally useless in terms of coverage.
I mentioned that the cushion foundation was what got me curious about the Beauty Blender and that's because I had a feeling that they were made of the same sponge material. When I felt it for the first time, I'd say they are similar in texture but the Beauty Blender really is unique with it's own sponge formulation. It's latex free so it's perfect for people who have latex allergies. I don't know what this sponge is made out of but it's really worth the price.
Speaking of price, it's pretty expensive for just a makeup sponge. But like I said, totally worth it. They recommend you use it up to 3 months before you throw it away and get a new one but I'm going to see how long I can make it stretch. It's really all about hygienic reasons. Sponges are going to collect bacteria after a while. I wash mine every single time I use it so maybe it won't be too bad.
So I've raved about how good this thing is, but let me point out some negatives just to even out the playing field. Other than the price, I have two main critiques about this product:
Stains: This thing stains like none other. You really have to scrub it if you want to get all the stains out, and even then it might not all come out. I'm scared of ripping it if I scrub too hard so I eventually gave up trying to get it looking all nice and clean. If you're one of those people who are super OCD about getting your sponges looking 100% clean, you're going to have to suck it up with this one because it's not worth all the effort to get a clean looking sponge. If the water and soap runs clean, just go with it.
Dye: As you can see, I got the red limited edition that was for Sephora. I wanted the black one but they didn't carry any at the store I was at. When I washed it the first time before I used it, tons and tons of dye came out. It just kept coming out and out to the point where now my sponge is a washed out red-pink colour. I mean it still works perfectly fine but it's definitely not the colour I wanted it to be. Not a big deal, but I thought I should mention it just in case any other person was expecting to keep theirs super bright red. I'm not sure about the other colours, or maybe this was just the one I got.
Anyway, overall I really do like the Beauty Blender and I think it's so worth the hype.
Rating: ★★★★★ 5/5
Labels: beauty blender, cosmetics, makeup, review
Recent Purchases
Your girl has been busy these past days... shopping. These are my recent purchases within the last two months or so. I really need to cut back on all the unnecessary things that I don't need and save up some cash. I basically had a bunch of cash in my wallet because I was saving up to by a David's Tea travel mug but decided last minute against buying it because I figured I couldn't use it as much as I imagined I would
(good choice made, btw). Instead, I spent it on some items that I've been wanting to buy for a while now and I'm quite happy.
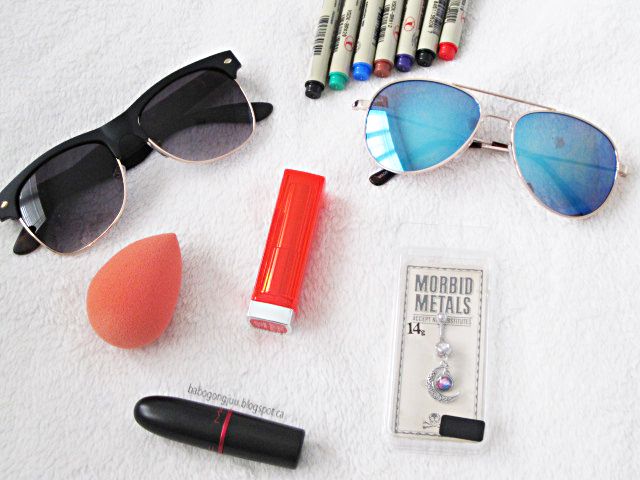
First thing is that I needed new sunglasses. I buy sunglasses every year around Spring/Summer because I like getting the really cheap ones so I can always switch it up ever year if I end up getting bored of the current style. Personally, I don't see a point in buying expensive sunglasses because these get broken and tossed around so often, it's just not worth it.
I went around the mall to different stores and tired out their sunglasses but decided on two pairs from Call It Spring. They were having a 2 for $20 sale which suckered me in because of course I want two instead of one! I tried a couple of pairs on and settled with these two. I really like them because for once, they frame my face really well! Even though they're pretty cheap, I find the quality of these trumps say, Forever21 sunglasses.
The
blue reflective aviators aren't flimsy like my previous ones from H&M. They're small enough to fit my face and the nose grips are screwed in so they won't come loose
(a previous problem I had with my older pair).
I can't find the other pair on their website, but
these are the closest ones. The pattern on them are just different. I really like this pair because the side of them are a matte finish and it feels super smooth! You wouldn't think this is anything special but they make the biggest difference when you slide them on your head because they go on really easily and they feel really nice against your ears. As a person that wears glasses with a rubbery end, I can really tell the difference. The only thing I want to note about this pair is that it came with a sticker that warns you not to look directly into the sun with these because they weren't made for that. I can't imagine anyone that would be looking directly at the sun anyway...
I should mention that I also bought this necklace from Call It Spring. They didn't have my sign in stores so they helped me order one and have it sent to my house. I'm still waiting on it to come in the mail. You know I can't pass up anything astrology!
The Beauty Blender wasn't something I was particularly planning to buy. I've thought about it a couple of times and I definitely wanted it, but I wasn't ready to shed 30 some-off dollars
(that's with Canadian tax and all) for a sponge! Zack convinced me to pick something out in Sephora when he practically dangled $10 in my face, so I quickly ran over and picked up a Beauty Blender. Thanks babe! I'll do a separate review for this because I have some points I really want to talk about.
I have two new lipsticks this month; Maybelline Vivid's Vibrant Mandarin and MAC's Viva Glam 2. I was looking at the Vivid's line and I knew I wanted one but I wasn't sure which one. Vibrant Mandarin was the only one that really caught my eye. Ever since trying out Revlon's Rendezvous, I was determined to find an orange that actually suit my skin tone and thankfully Vibrant Mandarin does! It's the perfect orange with a red undertone which is what helps me pull this colour off.
As for the Viva Glam 2- I went into MAC looking for a nude MLBB and specifically requested something on the purple-brown-taupe side... Just nothing pink. The worker suggested this one and I tried it out in store. I loved it! This is going to be my go-to every day nude.
There's only one shown here, but I picked up two belly button jewelry from Hot Topic. The other one is a gold arrow. I was a little iffy about buying their jewelry because I heard they're really cheap but the girl working there said she's been wearing hers for a long time and nothing has happened. It's also made of surgical steel, so it should be okay... I'll report back if anything changes.
Last but not least, I purchased a set of Sakura Pigma Brush pens. I really want to get into watercolour painting so these pens are going to be perfect for doing line work. I'm going to try and make it a goal to do at least 5 watercolour paintings this summer. So far I've tested them out and they're really nice.
Labels: beauty blender, belly button, lipstick, mac, makeup, maybelline, pen, sunglasses
MAC Cyber Lipstick Review
I am so excited to do this review! I recently received MAC's Cyber for my birthday which has been on my wishlist for so long and let me tell you, I plan on wearing the heck out of this.
So Cyber is one of those super dark vampy lip colours that will probably scare off a bunch of people, but those are the colours I absolutely adore. It's dark
dark purple with cool undertones... so yeah, it makes me look like a pale vampire; perfection. It's a satin finish so there's a bit of a glossy sheen to it and it can emphasize dry flaky lips so always remember to prep and exfoliate your lips before applying! I would also advise you to use a lip liner with this just to avoid bleeding.
Here it is swatched in natural lighting. I'd say this is truer to it's colour than it is in it's bullet and in direct sunlight. I find that the colour may change slighting in different lighting, looking more saturated in bright light and more towards a black-purple in low lighting. The bullet looks more of a blue-purple.
Here's a close up lip swatch in direct bright natural lighting. I was facing a window on a very sunny day when I took this and I'd say this colour looks more like the bullet colour.
I also took a picture with it on in natural lighting again, but on a less sunny day. Depending on the number of layers you put on, I think you can sheer this colour out to make it less dark and more wearable.
Rating: ★★★★★ 5/5
Overall, I loveeee this lipstick and I actually like how the colour differs in different lighting. This is my first ever MAC product and I'm so tempted to buy other lipsticks!
Labels: cosmetics, lipstick, mac, makeup, review
2015 Favourite Lipsticks
Hi cuties!
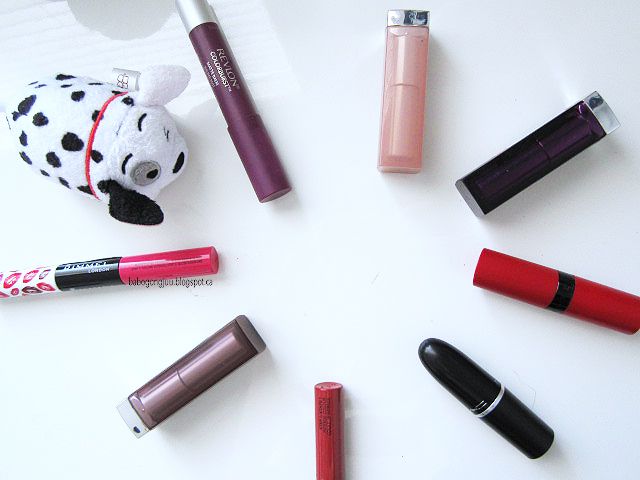
I've been on such a lipstick craze lately and decided to do a favourites post. These are the colours that I've been loving on my lips lately. Most of these are from the drugstore. Lipsticks are really addicting to collect because drugstore ones are only a couple of bucks each so I have a habit of purchasing one every time I see one on sale at the drugstore.
I'm thinking about trying Maybelline's Vivid and Rebel Bloom collection but those colours were a little out of my comfort zone. Maybe I'll drag a friend along and swatch with me until I find one that I think will look good on me. I want a really bright vibrant colour for the spring this year!
Anyway, here's a bunch of swatches to give you an idea of some of the shades I lean towards.
1. Rimmel London Provocalips in Little Minx
This is my very first bright fuschia colour. I've always been afraid of this colour but at the same time so intrigued so I bit the bullet and got it with my fingers crossed. It turned out to be such a fun colour on me! I also love the 16hr formula of this product.
2. Rimmel London Provocalips in Heartbreaker
Another 16hr Provocalips! It looks a little more brown in the picture but in real life it's a little more red toned. I'd say this is one of the very few warmer toned colours I own.
3. MAC Lipstick in Cyber
Ah, the famous Cyber! The swatch doesn't do it real justice, it's more of a dark purple. This lipstick is sooooo love. You'll feel like a badass wearing this.
4. Rimmel London Lasting Finish by Kate Lipstick in 111 Kiss of Life
This is the perfect red for me. It's a cooltoned matte red that every girl needs in her collection. So happy it's a cheap drugstore product, yet it lasts a long time on my lips without drying!
5. Revlon Colourburst Matte Balm in Shameless
This is straight up purple, similar to MAC's Heroine. It's super pigmented and cooltoned but doesn't stain your lips.
6. Maybelline Colour Sensational Creamy Mattes Lipstick in Touch of Spice
This is the colour I've been reaching for the most lately. It's a dusty red and it's such a nice colour on the lips when you want something red but nothing too bright. I call this my "nude red".
7. Maybelline Colour Sensational The Buffs Lipstick in Truffle Tease
Truffle Tease is my favourite nude because it's a brown-nude that a little darker than my skintone so it doesn't make me look dead. The formula is also really creamy and hydrating on my lips.
8. Maybelline Colour Sensational Lipstick in Blissful Berry
This is another purple colour but I'd say it's more like if Shameless and Little Minx had a love-baby. It's a purple berry colour that is good for the fall. It's also has a bit of a sheen to it that I don't particular mind even though I prefer mattes over any other finishes.
What are your favourite lipstick shades? Got any recommendations? Own and love any of these colours? Let me know!
Labels: cosmetics, favourites, lipstick, mac, makeup, maybelline, revlon, rimmel
Kat Von D Spellbinding Eyeshadow Book Review
Heya cuties,
So I'm finally writing a review on the
Kat Von D Spellbinding Eyeshadow Book! Spoiler alert, let me just say this now, I am in love with this.
I adore Kat Von D a lot. As an artist and just a rad girl all around, she's one of the people that I idolize and sometimes I look at her and I think to myself, 'damn I wish I was her'. My cousin went to her shop to get a tattoo and met Kat and said that Kat is one of the nicest and most humble people she has ever met. I really appreciate that about her. Her being an art-based person really gives me a deeper connection because I'm also an art-based person so I know whatever she comes out with is really artsy.
So let's talk about packaging because you can't mention Kat Von D and not talk about packaging. One thing that I love about this pallet is that the illustrations and designs for her products are all personally drawn by her. The drawing on the front of the pallet alone is just so beautiful, isn't it? Her style is definitely right up my ally. This is the front of the box it comes in, but the pallet is the exact same thing but with a black boarder. The back
(on the box), features all the colours in a grid.
What's different about the pack on the actual pallet is that this has a "chart" that shows colour combinations you could do. I think one of the main points of these shadows are that you could mix two shadows together and it'll form a completely different shade.
How to use: Each set of shades are paired together to create perfect layered looks. Apply "Geek" on lids, then blend "Fallen" on top for a bronzed peach shadow. For a completely different look, apply "Fallen" on the lids, then blend "Geek" on top for a perfect golden shadow.
This is what it looks like when you first open it up. There are three diagrams of three different looks you can try out. There's also a clear film over the top of the shadows with their names printed on top. I find that this is a little bit annoying to hold back when you're trying to use the shadows, but I guess it is helpful for not getting shadow all over the top of the lid.
Here's an overview of all the names. The ones with a star next to the names are "never before seen" shades. As you can see, there are quite a few of this some it makes getting this pallet really worth it since there wouldn't be too many repeats of other shadows you might already have.
At first glance, my favourite shades were
Oddfellow (black with teal glitter),
Queen (a redish brown-green duo chrome),
Wonderland (dark plum with pink glitter), and
WTF (bright red with purple-ish undertone). After using this pallet for a while, the colour that I grew to love was
Smile Now because it looks like an orange-peach colour but when applied on the lids, it actually has a pink duo-chrome action going on. I really like this as an inner corner highlight because when the light hits it in an angle, it's pink.
This is definitely a pretty colourful pallet, but I think it's very good for someone who is just starting to use brighter colours, like I am. I'm not all for the full-on-bright-colours-all-over-the-eyes but I like a hint of colour here and there or different tones of neutral-ish colours. For example, sometimes I use a red-ish shade like
Stupid Audocorrect in my crease as a transition shade instead of a standard taupe or brown. Or sometimes I use a combination of the greener shades like
Gunner and
Hexagram with a golden shade to highlight like
Sunset Blvd or
Precious.
Hexagram is an olive-green type shade that is a little more neutral than a straight up green so it's easy to work with without making your eyes look like a rainbow of colours, while
Gunner is a very saturated green to give it that pop of colour. The one shade I haven't really used is
Bukowski, which is that one bright blue on the bottom, only because I really don't rock blue very well without looking like a hooker. I have one other bright blue shadow in my collection and I don't even use that one either so I don't know how I'm going to use this one.
The texture of these shadows are super buttery smooth. Just swatching them with my fingertips felt like a dream because they were just so soft. The pigmentation is excellent, but I would use an eyeshadow primer under them just so the colours are as pigmented as they can be and to ensure they last all day and don't crease. In terms of fallout, the darker colours, especially the ones with glitter, tend to have a bit of fallout. It's not a crazy amount, but I'm assuming you tap off the extra on your brush before applying like you should be doing. Speaking of tapping off the excess, when you do so, you'll see that a ton of it comes off of the brush. I think due to how soft and finely milled these shadows seem to be, this translates to a lot of potential fallout. Having said that, I would imagine that this means you will use up these shadows pretty quickly if half of it is fall out that you can't press back into the shadow. That's just loose powder being blown everywhere! That's something you should keep in mind.
Another thing I want to mention is that the golden shades,
Precious and
Sunset Blvd (especially Precious), seem a bit powdery. It's almost hard to get them on the lid without packing them on a ton.
The thing that I love most like I've mention before is that a lot of these shadows seem to be duo-chrome
(which I've always love love LOVED) and what makes them so special is that you can layer them to get a different shade! Now, I'm not talking about like mixing a blue and a green will give you an orange (that's not even possible to begin with), but something like
Birdcage and
Gunner layered on top of each other makes a grassy-lime green. This also means that blending these colours into each other is a breeze because the overlap will be an automatic transition colour! Honestly, I think this is really what makes this pallet so unique.
I got this eyeshadow book as a birthday present this year but I know Sephora sold it for around $55 or so. I'm not sure if they still sell it now because I don't see it on the Sephora website anymore but if you really want to pick this up, try walking into the store to see if it's there and if not, maybe eBay will be your next best bet.
Rating: ★★★★☆ 4/5
I really want to give this a perfect score but as reviewed, there are some cons to this pallet so I cannot give it 5/5. Although I has quickly became one of my favourites, next to the Naked 2 pallet. This is my first ever Kat Von D cosmetic item and it has definitely given me an excellent impression on the quality of her products. I'm curious and excited to try out a few of her items in the future!
Labels: cosmetics, eyeshadow, kat von d, makeup, review
January 2015 Favourites
Hi cuties,
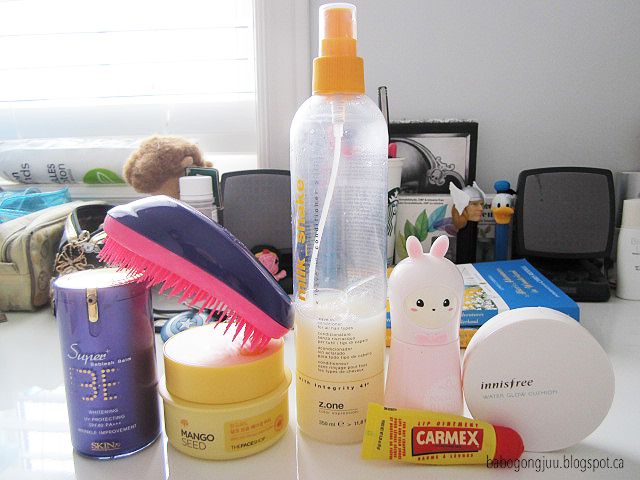
I've never done one of these kinds of posts before but I wanted to show you a couple of items I've been loving for the past month. I don't think I'll make this a monthly thing because I don't buy new products too often, but maybe I'll try and showcase an item or two whenever I find ones that I really like! So here's what I've been loving so far.
Skin79 Super Plus BB Cream (purple)
I've used almost all the Skin79 BB Creams; pink, gold, orange, green
(tested), and now purple! I have to say the purple version is by far my favourite one. I use to really love the gold one because it was for dry skin and also has that grey tone (which I actually like because I'm cool toned!) but the purple is like the gold version but on crack; it's so much more moisturizing!
Tangle Teezer
This thing has been around for a while and I remember everyone raving about it. I never use to comb my hair until I started bleaching my hair. Now I get tangles all the time and this literally saved my life. Not only does it get all the tangles out, I can use this on my wet hair which makes drying my hair so much faster without my hair looking poofy after a blow dry.
The Face Shop Mango Seed Silk Moisturizing Facial Butter
Anyone with dry skin will love this product. It's a heavy duty facial butter that seriously keeps your skin moisturized for hours and hours. It's recommended to be used as a night cream but if you're like me with extremely dry skin, a thin layer of this under your foundation will keep your skin from drying out throughout the day.
Z.One Concept Milk_Shake Leave In Conditioner
My hairstylist friend Mike introduced me to this product. He always uses it in my hair after he washes it and it makes my hair much more manageable especially after all I've done to my hair. I use it daily and douse my hair with it. I even bought a second bottle! The best part is that it smells like cupcakes!
Tony Moly Pocket Bunny Moist Mist
I've had this product for a long time now and I recently rediscovered it. I love spraying this on my face before applying bb cream and it gives me such a dewy finish. It's good to spray on top of your makeup to set it and throughout the day to freshen your face when it's feeling dry.
Carmex Original Moisturizing Lip Balm (tube)
This stuff is heaven sent. I have extremely dry and flaky lips and this stuff has healed my lips up really good. I especially like the tubed version. I think it's extra strength because the instructions on the back says not to use it more than 3-4 times a day. I use this in the morning right before applying makeup and at night right after I shower/before bed.
Innisfree Water Glow Cushion
I just did a review on this product so you guys all know how much I love this thing. I've been using it every day since I got it and it has kept my skin moisturized without looking cakey and gives my skin a brightening glow. Big plus for being super convenient for travel and fast application.
So there are all my favourites for the month of January. I've recently bought some new products that I love but that will have to be saved for another post for a later time! Tried any of these products? Love something else? Let me know!
Labels: cosmetics, favourites, innisfree, makeup, skin79, tangle teezer, thefaceshop, tonymoly, z.one
Innisfree Water Glow Cushion Review
Hey cuties,
I'm super excited to be doing this review right now! A little back story: my friend introduced me to her IOPE/Amore Pacific
(I can't remember which one she has) cushion and raved about how cushion foundations are really great and handy. I've heard about them from Youtube and Korean beauty blogs but never really paid too much attention to them until now. This is my first cushion foundation and I wasn't too sure how I'd like it so I went with a cheaper alternative to the higher end Hera/IOPE/Amore Pacific route and got Innisfree!
This is also my first Innisfree product and spoiler alert: I'm impressed!
I believe Innisfree's most famous cushion is their Long Wear Cushion (matte), however I went with the Water Glow (dewy) version because I have dry skin!
I haven't seen many reviews for this product so I hope you enjoy :)
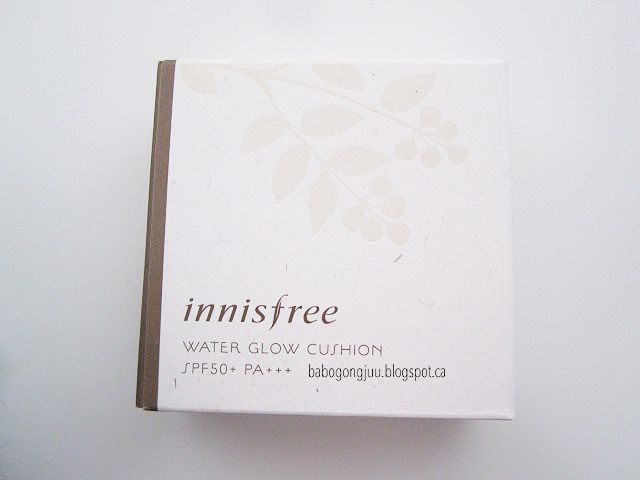
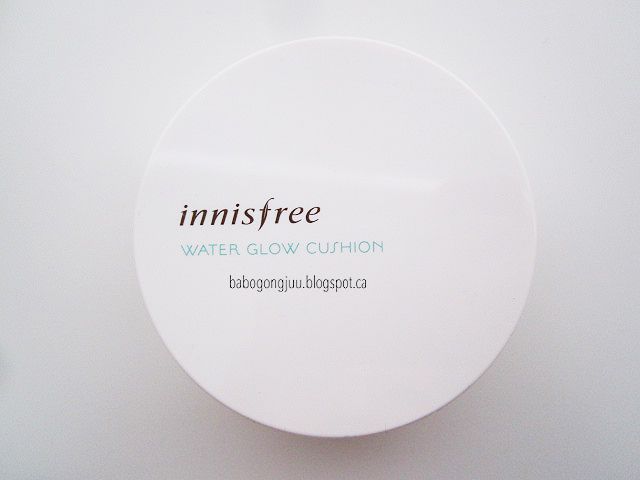
Front
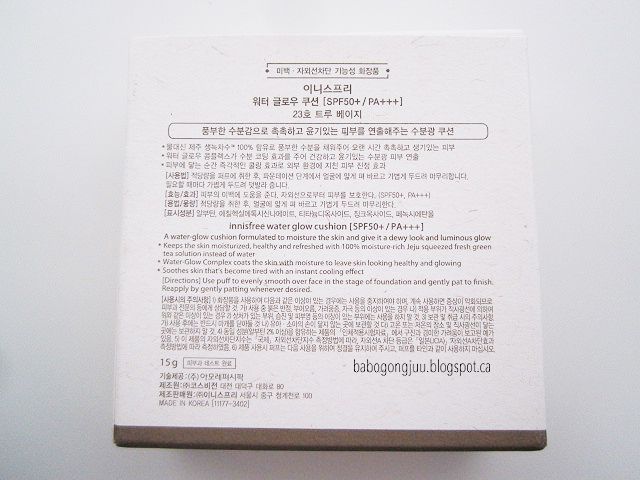
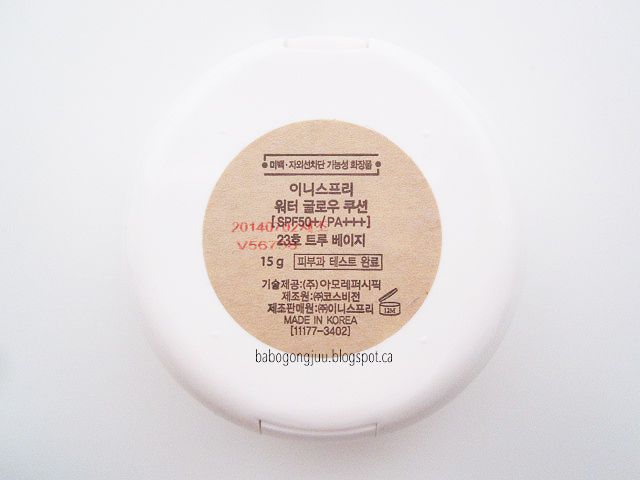
Back
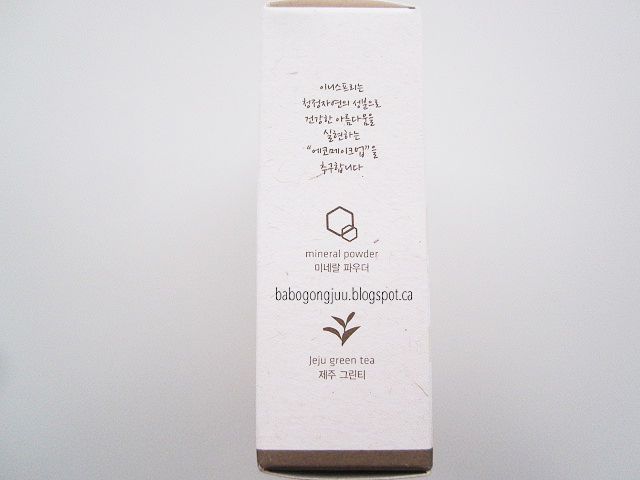
Side 1
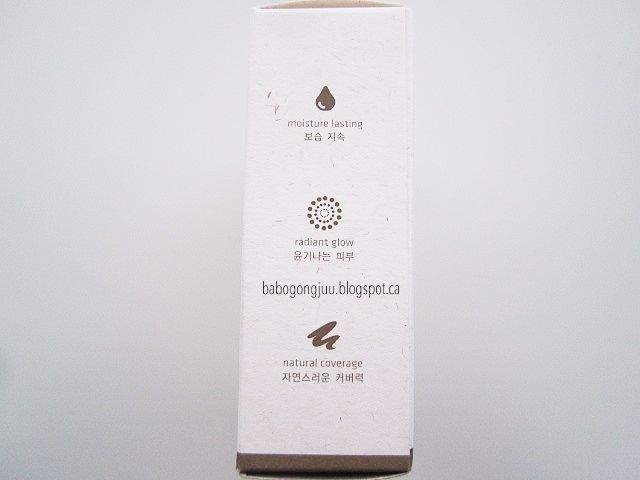
Side 2
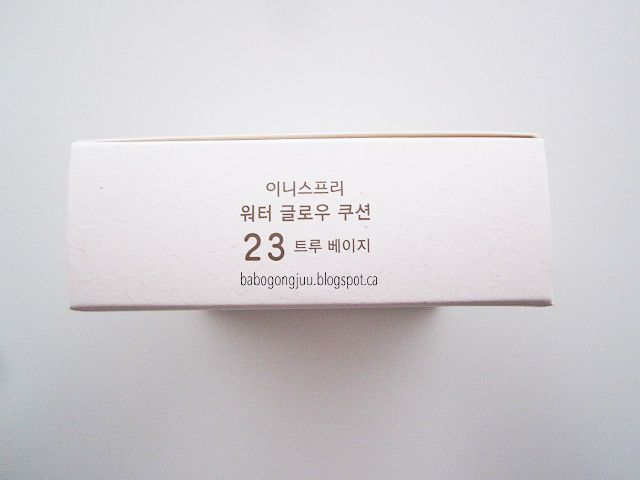
Top
It comes in a paper packaging which feels like it's made from recycled paper. On a design standpoint, I really like how they added icons on the side for some quick indications of some of the benefits of the product. The only thing I found funny is that they printed their front cover sideways of everything else.
I got the colour #23 True Beige which is the darkest of the three available shades. One thing I noticed when I was researching this product was the colour swatches Innisfree gives you of each shade is totally misleading. It looked like #23 would be really dark, tan, and yellow toned which was a huge worry for me since I wouldn't consider my skin to be all that dark, and I'm definitely more cool toned (yellow undertone but with a cool tone). My friend who is much paler than I am, reassured me that the other two colors would be way too pale for me and to just go with the darkest shade and so I did. More on that to come!
The compact itself it very sleek and simple. It fits nicely in the palm of my hand and isn't too thick or heavy to travel with. This will be perfect on the days I'm over at my boyfriend's house and do not want to bring a whole bottle of foundation + brushes.
The back has all the specifications: name, colour, manufacture date, and product amount. You get 15g of product per cushion and they are also refillable so you don't have to keep buying new compacts. It has a 12 month expiry life but I'm pretty sure you'll need to buy a new refill after 2-3 months if you use it daily.
The Water Glow cushion has SPF 50+ and PA+++ which I've found pretty standard for Korean BB/CC/foundation.
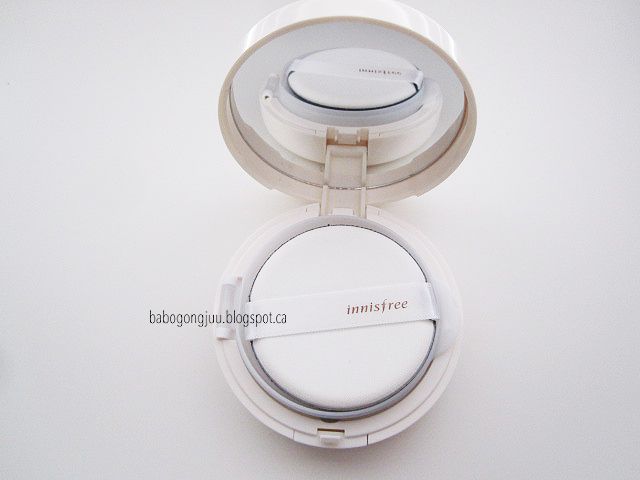
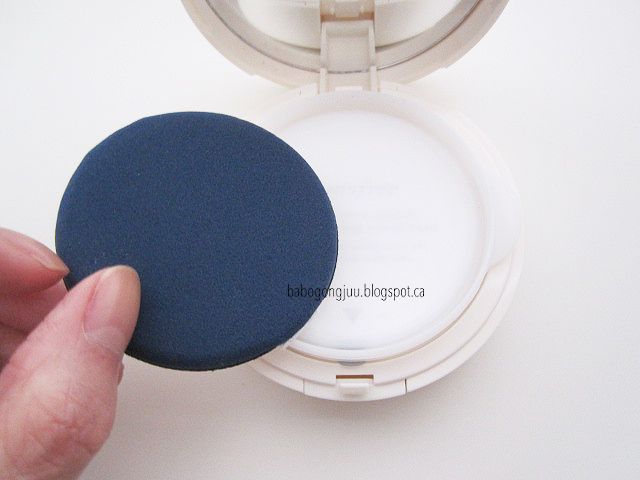
When you first open the compact, you'll find that it has a mirror and a sponge. This might seem random but the first thing I noticed was how clear this mirror is. I've never seen a mirror inside a makeup product so clear and sharp. Even the mirror in my Naked 2 palette doesn't compare to this mirror and I find it super useful to use on the go.
The sponge is really the star of the show. This is the key to getting the perfect application of foundation on your skin. The texture of the sponge isn't like any other sponge I've ever felt and although I've never felt the Beauty Blender before, I have a feeling they are made of the same material. It's soft, airy, and the pores on it are super tiny so it doesn't absorb too much product.
There's a plastic cover that keeps the cushion air tight and separates the sponge from the product to reduce bacteria. If you're concerned about the sanitary factor of using a sponge, don't worry; you can wash these sponges. There are a couple of helpful videos on Youtube showing you how to get them super clean and the best way I've found is using a bar soap.
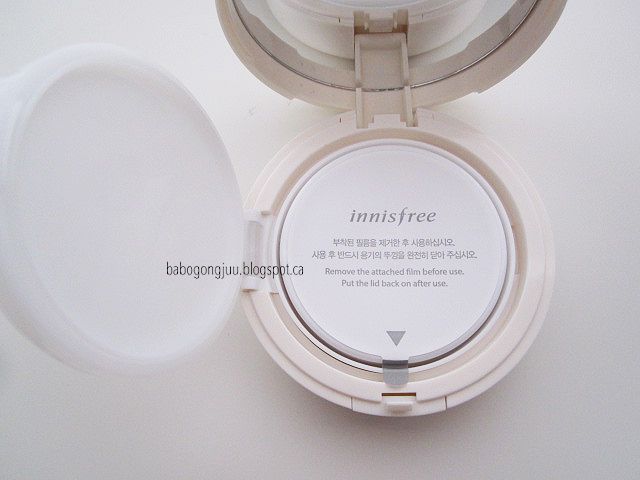
When you first open the compact, there's a film that seals the product which you remove before using. I guess this is to show that it hasn't been tampered with.
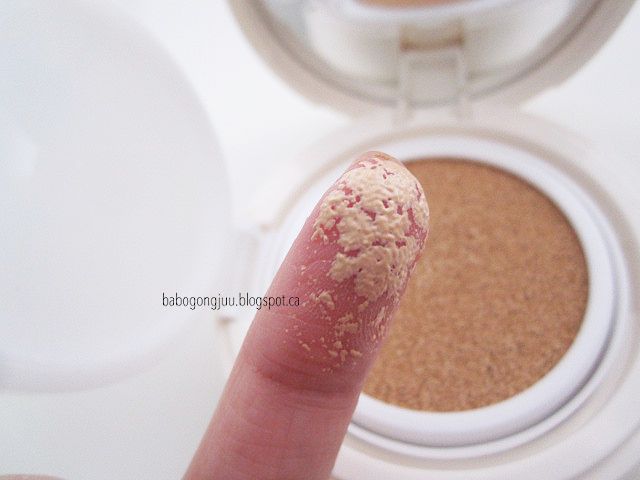
To get the product, you have to press down into the cushion. As you can see, the product itself is much lighter than the cushion itself which is very misleading when people are trying to choose shades! Always keep in mind that Korean girls have super pale skin so all their foundations are in the lighter side of the spectrum.
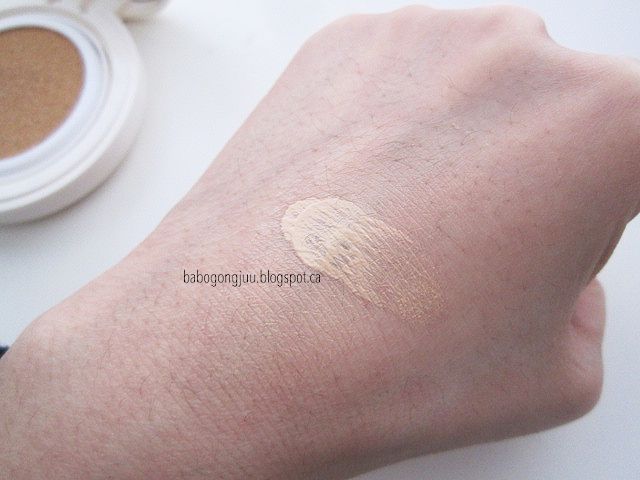
When swatched on my hand, you can see the difference between my cool skin tone versus the warmer tone of the foundation. It also has a light texture. It's not quite watery but it's not too thick like say Skin79's purple BB cream which has a gel-like texture.
After I tapped/blended it out with the sponge, it blended into my skin quite nicely. I was surprised to find that it was a good colour match for my face. Although it is slightly warm toned, it neutralized my skin tone well and gave a brightening affect.
The coverage for this foundation is light to medium. It's definitely build-able and gets better the more layers you apply. I usually do an overall application and go back with a second layer on areas that need higher covers like around the nose and on my dark circles.
Overall I am very impressed by this product and I've been using it every day since I got it. I got mine on eBay for around $26 CAD while the cheapest refill I've seen goes for $17-18. This has been a very pleasant introduction of cushion foundations and I'm eagered to try other brands!
Rating: ★★★★★ 5/5
xoxo.
Labels: cosmetics, cushion, foundation, innisfree, korean, makeup, review
Everyday Makeup Staples
Hi cuties,
Today I'm going to talk about my everyday makeup staples. These are some of the products I've been using every day on my face and most of these are HG worthy!
Urban Decay Eyeshadow Primer Potion in Original
This is probably my holy grail primer. I've used the Too Faced version which was comparable, but I find UDPP makes my eyeshadows more vibrant and the formula is less oily. I have to use this every time I use eyeshadow or liner on my eye. It makes everything stay put on my eyes all day and night.
Maybelline Lash Sensational Mascara/The Falsies Volume Mascara
I only use one mascara at a time, and therefore I was using Lash Sensational at the time, which was a nice mascara. It lengthened and fanned out my lashes well. My HG is The Falsies. It makes my lashes look full, long, and keeps them curled.
Maybelline Instant Age Rewind Eraser Dark Circles in Fair
Everyone and their moms love this concealer. I like this for concealing but most of all, highlighting my face. It's a light formula so it does not cake up, however it does not have the fullest coverage out there so keep that in mind. I love using this for light makeup days as well.
The Face Shop Lovely me:ex Design My Eyebow in 03 Black Brown
I really like this eyebrow pencil and I go back to it time and time again. It formula is not too soft but not too hard so it's easy to fill in my brows to make them full and as light or dark as I want. It's a twist-up pencil with an angle so it's easy to use and it comes with a spooly brush on the end for blending and combing.
Physicians Formula Eye Booster Liquid Eyeliner in Ultra Black
This is my favourite drugstore liquid liner because it's super black and it has a brush tip. It's the most similar to my favourite DollyWink liquid eyeliner for a slightly cheaper price. I can't tell you if the lash boosting claim actually works though.
The Balm Bahama Mama Bronzer
I love this brozer because it's a neutral to cool toned brown unlike most bronzers which makes it ideal for cool toned people like me and also doubles up well for contour.
The Balm Mary-Lou Manizer
This is my favourite highlighter that I own. It's a champagne colour that makes you glow like it's nobodies business. I love this especially for a nose highlight. The product is not glittery, slightly shimmery but overall just gives the perfect glow to the skin. It's worth the money.
Labels: bronzer, cosmetics, eyeliner, favourites, highlighter, makeup, mascara, physicians formula, primer
Etude House Precious Mineral Any Cushion Review
Hey cutie!
So I'm back a year later with another cushion review. This time, I'll be talking about Etude House's Precious Mineral Any Cushion. I had two refills of this, and I'm just finishing my last one so I think I have a good idea of what I want to say in this review.
First, I want to say that the packaging is much bulkier in comparison to my Innisfree Water Glow Cushion. If I can remember correctly, I've been told that Etude House cushions fit into other brands under Amore Pacfic such as IOPE, Hera, and so on. Innisfree however, does not, and their sizes are different than other cushions. If I had to choose, I do prefer the Innisfree compact better because it's a little slimmer and it's flat top allows you to stack it with other products with ease. Etude House has a curved top which makes it impractical to store sometimes.
Second, let's compare the sponge. I think the key to a good cushion is not only the formula but also the sponge. Etude House's sponge is very airy and has a bit of a thickness to it which is ideal for cushions. Innisfree's sponge is slightly less thick, but both sponge's texture are similar. For this reason, I'll say Etude House wins this portion.
I got this cushion in the shade W24 Honey Beige which is their darkest shade but I find it is super warm against my skin. You can clearly see the difference in colour from the picture. The texture of this cushion is a little thicker than the Innisfree Water Glow. If you're tried the Precious Mineral BB Cream, it's the same product, just in a cushion form. For both the BB cream and cushion version, I found it is heavier and a little cakey on my dry skin. It has never been my favourite formula.
The coverage of the cushion is about a light-medium to buildable medium in my opinion. It evened out my skin tone and reduced the redness of my cheeks and also brightened my face despite the yellowness of it. There is a slight perfume scent to it but it does not last on the face. I'd say this lasts about 4 hours into the day but anything after that will soon start to fade. The issue I have with this cushion is how cakey it tends to make my face look up close and it sometimes creases in my worry lines
(I don't set my cushions with powder). For this reason, I try to apply a thin layer upon application.
Overall, this is not my favourite cushion although I know a lot of people do enjoy it. I much prefer my Innisfree Water Glow but this is a "slightly"
(not by much) cheaper alternative. If you have oily to combination skin, maybe this will work out much better for you.
Rating: ★★★☆☆ 3/5
Labels: cosmetics, cushion, etude house, foundation, korean, makeup, review
[Part 1] Maybelline Dream Lumi Touch Highlighting Concealer in Ivory Review
Hello cutieeeeee,
I'm gonna do a two-part concealer review on the Maybelline Dream Lumi and Fit Me concealers! First I'll be reviewing the Dream Lumi, then the Fit Me, and do a comparison at the end :)
*By the way, this has been in my drafts for a while so excuse my still-blonde pictures!
So this concealer is supposed to highlight and brighten your face so it's really great under your eyes and bridge of your nose; anywhere you want to highlight. The tip has a brush applicator which makes it easy to apply on your face and even blend out if you don't dispense too much product at once. I usually just use my fingers or my foundation brush though.
I got the lightest colour Ivory because I wanted the maximum highlight I could possible get. My skin is relatively light so it actually matched well. It blends out okay and you really only need a little bit.
Rating: ★★★★☆ 4/5
Overall I like this product for the brightening aspect of it. The only thing I don't like is how pricey it can be for such little product and how it can get a little cakey if you add too much. Other than that, it's a pretty decent highlighting concealer but don't expect to cover blemishes with this!
Labels: concealer, cosmetics, makeup, maybelline, review
[Part 2] Maybelline Fit Me Concealer in 10 Light Review
Hello again, cuties!
This is the second part to my concealer review. I'll be talking about the Fit Me concealer by Maybelline, and then do a comparison at the end!
*By the way, this has been in my drafts for a while so excuse my still-blonde pictures!
This concealer didn't come with lots of packaging which I liked because that's just less junk for me to throw out. There's tape around the seal to insure it hasn't been opened yet. I got the shade 10 Light which is more yellow toned. (I should have picked Fair which is more pink!)
Despite me getting the pinker toned shade, this concealer still managed to look yellow on me! It blended into my skin okay but I was hoping for something more cool toned.
I got the colours mixed up and should've gotten Fair, which is why this was so yellow on me. My bad!
This concealer is best for blemishes and covering dark circles, but probably won't do much for you in terms of brightening or highlighting. It can cover pimples if you apply two coats. I just did one coat to show you the coverage.
Rating: ★★★★☆ 4/5
Overall this is a good concealer that many makeup junkies enjoy. It has good coverage and doesn't cake under the eyes too much. Personally, I like brightening concealers a lot more as I don't have many blemishes to cover.
Comparison
So which one is better? They're both good!... For different reasons. Fit Me is good to cover blemishes while Dream Lumi gives a really nice highlighting effect. Here they are under each of my eye in the same lighting. You can really see how bright the Dream Lumi is in direct sunlight.
Labels: concealer, cosmetics, makeup, maybelline, review
The Lipstick Tag
I've been really into lipsticks lately so I thought doing this tag would be fun :) My collection is only in it's baby stage of growing so I think it'll be fun to re-do this in a year or two from now! There's apparently a blog version of this tag and a Youtube version. I'm going to do both version's questions :)
How many lipsticks do you own?
30 but I lost one. (Not including liquid stains and glosses!)
What was your first ever lipstick?
I believe it's a wine coloured Lancome lipstick that belonged to my mom but she never used it. I took it and wore it maybe twice in my life. I still remember the old lady scent it has, haha.
What is your favourite brand for lipstick?
Looking at my collection, I'd have to say Maybelline. I don't own many high end lipsticks but when it comes to drugstore, Maybelline is always on point with their lipsticks.
What is your most worn lipstick?
Maybelline Color Sensational The Buffs in Truffle Tease. It's a really good brown nude on me which is so easy to throw on and goes with everything.
What is your favourite finish?
Matte! I love matte lipsticks because they look so good on the lips and are easier to manage than glossy ones. They don't tend to get everywhere like on your face and teeth.
What was the last lipstick you bought?
Milani Sangria. It's a dupe or MAC's Rebel and I love it!
How many lip products do you currently have in your bag? (including glosses and balms)
I currently have 4 lip products in my backpack. There use to be way more but I recently cleaned it out, phew.
What lipstick do your use to rock a red lip?
Rimmel Lasting Finish Matte by Kate Moss in 111 Kiss of Life. It's such a good matte cool toned red that goes well with my skin tone. I've gotten lots of compliments while wearing this shade!
How do you store your lipsticks?
I usually just throw them in a bunch of makeup bags that I have on my table which carry the rest of my makeup collection. I don't have special containers or shelves to store my makeup though I'm starting to think I should.
What lip products are you currently lusting after?
Kat Von D Studded Kiss lipstick in Lolita and Lime Crime Velvatine in Cashmere
(however I refuse to buy Lime Crime! I just want a dupe of the colour).
Favourite balm/treatment?
I have two because both together have helped my lips heal up super well. Carmex and Blistex Lip Medex.
Best eye-catching red?
Probably my Rimmel 111 again. All my other reds are pretty dark/wine coloured which isn't as eye-catching in my opinion.
Best luxury & best drugstore?
I don't own any "luxury" brands and the closest one would be MAC's Cyber&Viva Glam2. Best drugstore goes to any of the Maybelline Color Sensations!
Best MAC lipstick?
Cyber lol, though I currently only own two MAC lipsticks.
The most disappointing?
Rimmel Lasting Finish Matte by Kate Moss in 102. It's such a surprise to me that I love 111 so much but 102 is a total let down! Not only is the colour horrible on me, but the formula on this particular one is so bad! It settles into lip lines and makes dead skin so visible.
Liner - yes or no?
Yes but no? I know the importance of lip liner and I do use it when I'm wearing a bright red but I lack lip liners for every other colour so I don't use one as much as I'd like to. I think I should just invest in one of those clear ones.
Best gloss?
None. I hate gloss!
Something extra!
Here's my three vampy shades! Left to right: NYX Soft Matte Lip Cream in Transylvania, Wet n Wild's Vamp It Up, MAC's Cyber. If you're looking to get this colour, here's the differences. The NYX one is the most matte but also the lightest of the three. The Wet n Wild one is super dark and even more opaque than MAC's but it also goes on a little patchy on your lips. MAC's Cyber is a satin finish and glides on really nicely but is the medium shade of the three.
Labels: lipstick, mac, makeup, maybelline, nyx, revlon, rimmel, tag, wet n wild
Rimmel Lasting Finish Matte Lipstick By Kate Moss (102) Review
Hello cuties,
So I went ahead and got another Rimmel Kate Moss lipstick because I adored my 111 so much. I was debating about this colour and another more paler version but my brother picked this one so I went with it. I also picked the same matte finish.
So this is the colour. It's a bright coral-pink which looked very lovely when I swatched it on my hand, but as soon as I put it on my lips, I instantly knew it was the wrong shade for me and I regret not getting the paler shade. The colour just did not match my skin tone. I think this colour would work very will with someone who had a pink undertone but it was definitely clashing with my yellower undertone. Sometimes when I dab a little bit of the colour on the inside of my lips, I can make it work, but I definitely can't just wear it full on my lips.
Although the finish is the same as the 111 that I love so much, this one was horrible to apply on my lips! It just accentuated the cracks of my lips and made my lips look so terribly chapped. Even when I've fully exfoliated my lips to be baby butt smooth, this lipstick has some kind of super power to make my lips still look chapped and gross! Maybe it's just this colour that does it because I have no problems with my red 111.
Rating: ★★☆☆☆ 2/5
Anyway, this was a very big disappointment. The colour choice isn't their fault, but the formula is! I just don't understand why 111 and 102 have such different outcomes when they're both from the same matte lipstick line.
Labels: cosmetics, lipstick, makeup, review, rimmel
Beauty Blender Review
I can't seem to sleep right now, so you guys are gonna get a mini review right now. I've been really vocal about my recent purchase of the Beauty Blender and that's because I'm totally in love with this thing. That's the review in a nutshell, but let me go through the pros and cons.
So I have to admit, I was pretty skeptical about this when it first got really popular amongst the beauty community. It seemed like just an egg shaped sponge, big whoop. It wasn't until I tried my Innisfree cusion foundation that I started to realize that maybe this thing wasn't such BS after all. The sponge on the cushion foundation felt different from regular makeup sponges and it made makeup application really easy and smooth. That's when my curiosity started to get to me.
When I got the opportunity to purchase something at Sephora, I ran straight to the Beauty Blender because I was so ready to see what the hype was all about... and let me tell you, the hype is so real it hurts.
This little guy literally does wonders to my face. The first time I used it, I saw the hype. It literally made my foundation look flawless like it never has before. Also, it did wonders to my dry skin and kept it from looking cakey even hours after application. It wasn't until my friend asked what I used on my face because my makeup was looking incredible that day (I was only using concealer and highlighter with the Beauty Blender) and said my face was extra dewy, that I knew this thing really was doing a lot for me. I've never heard a single compliment on my face makeup until I used this thing so I think it speaks for itself.
You have to use this wet to get the full affects of what it can really do. I like that it adds extra dewiness and hydration to my face. Because it's a sponge, it does sheer out your foundation a tiny bit, but I still managed a medium coverage with one layer, so don't think it'll make your foundation totally useless in terms of coverage.
I mentioned that the cushion foundation was what got me curious about the Beauty Blender and that's because I had a feeling that they were made of the same sponge material. When I felt it for the first time, I'd say they are similar in texture but the Beauty Blender really is unique with it's own sponge formulation. It's latex free so it's perfect for people who have latex allergies. I don't know what this sponge is made out of but it's really worth the price.
Speaking of price, it's pretty expensive for just a makeup sponge. But like I said, totally worth it. They recommend you use it up to 3 months before you throw it away and get a new one but I'm going to see how long I can make it stretch. It's really all about hygienic reasons. Sponges are going to collect bacteria after a while. I wash mine every single time I use it so maybe it won't be too bad.
So I've raved about how good this thing is, but let me point out some negatives just to even out the playing field. Other than the price, I have two main critiques about this product:
Stains: This thing stains like none other. You really have to scrub it if you want to get all the stains out, and even then it might not all come out. I'm scared of ripping it if I scrub too hard so I eventually gave up trying to get it looking all nice and clean. If you're one of those people who are super OCD about getting your sponges looking 100% clean, you're going to have to suck it up with this one because it's not worth all the effort to get a clean looking sponge. If the water and soap runs clean, just go with it.
Dye: As you can see, I got the red limited edition that was for Sephora. I wanted the black one but they didn't carry any at the store I was at. When I washed it the first time before I used it, tons and tons of dye came out. It just kept coming out and out to the point where now my sponge is a washed out red-pink colour. I mean it still works perfectly fine but it's definitely not the colour I wanted it to be. Not a big deal, but I thought I should mention it just in case any other person was expecting to keep theirs super bright red. I'm not sure about the other colours, or maybe this was just the one I got.
Anyway, overall I really do like the Beauty Blender and I think it's so worth the hype.
Rating: ★★★★★ 5/5
Labels: beauty blender, cosmetics, makeup, review
Recent Purchases
Your girl has been busy these past days... shopping. These are my recent purchases within the last two months or so. I really need to cut back on all the unnecessary things that I don't need and save up some cash. I basically had a bunch of cash in my wallet because I was saving up to by a David's Tea travel mug but decided last minute against buying it because I figured I couldn't use it as much as I imagined I would
(good choice made, btw). Instead, I spent it on some items that I've been wanting to buy for a while now and I'm quite happy.
First thing is that I needed new sunglasses. I buy sunglasses every year around Spring/Summer because I like getting the really cheap ones so I can always switch it up ever year if I end up getting bored of the current style. Personally, I don't see a point in buying expensive sunglasses because these get broken and tossed around so often, it's just not worth it.
I went around the mall to different stores and tired out their sunglasses but decided on two pairs from Call It Spring. They were having a 2 for $20 sale which suckered me in because of course I want two instead of one! I tried a couple of pairs on and settled with these two. I really like them because for once, they frame my face really well! Even though they're pretty cheap, I find the quality of these trumps say, Forever21 sunglasses.
The
blue reflective aviators aren't flimsy like my previous ones from H&M. They're small enough to fit my face and the nose grips are screwed in so they won't come loose
(a previous problem I had with my older pair).
I can't find the other pair on their website, but
these are the closest ones. The pattern on them are just different. I really like this pair because the side of them are a matte finish and it feels super smooth! You wouldn't think this is anything special but they make the biggest difference when you slide them on your head because they go on really easily and they feel really nice against your ears. As a person that wears glasses with a rubbery end, I can really tell the difference. The only thing I want to note about this pair is that it came with a sticker that warns you not to look directly into the sun with these because they weren't made for that. I can't imagine anyone that would be looking directly at the sun anyway...
I should mention that I also bought this necklace from Call It Spring. They didn't have my sign in stores so they helped me order one and have it sent to my house. I'm still waiting on it to come in the mail. You know I can't pass up anything astrology!
The Beauty Blender wasn't something I was particularly planning to buy. I've thought about it a couple of times and I definitely wanted it, but I wasn't ready to shed 30 some-off dollars
(that's with Canadian tax and all) for a sponge! Zack convinced me to pick something out in Sephora when he practically dangled $10 in my face, so I quickly ran over and picked up a Beauty Blender. Thanks babe! I'll do a separate review for this because I have some points I really want to talk about.
I have two new lipsticks this month; Maybelline Vivid's Vibrant Mandarin and MAC's Viva Glam 2. I was looking at the Vivid's line and I knew I wanted one but I wasn't sure which one. Vibrant Mandarin was the only one that really caught my eye. Ever since trying out Revlon's Rendezvous, I was determined to find an orange that actually suit my skin tone and thankfully Vibrant Mandarin does! It's the perfect orange with a red undertone which is what helps me pull this colour off.
As for the Viva Glam 2- I went into MAC looking for a nude MLBB and specifically requested something on the purple-brown-taupe side... Just nothing pink. The worker suggested this one and I tried it out in store. I loved it! This is going to be my go-to every day nude.
There's only one shown here, but I picked up two belly button jewelry from Hot Topic. The other one is a gold arrow. I was a little iffy about buying their jewelry because I heard they're really cheap but the girl working there said she's been wearing hers for a long time and nothing has happened. It's also made of surgical steel, so it should be okay... I'll report back if anything changes.
Last but not least, I purchased a set of Sakura Pigma Brush pens. I really want to get into watercolour painting so these pens are going to be perfect for doing line work. I'm going to try and make it a goal to do at least 5 watercolour paintings this summer. So far I've tested them out and they're really nice.
Labels: beauty blender, belly button, lipstick, mac, makeup, maybelline, pen, sunglasses
MAC Cyber Lipstick Review
I am so excited to do this review! I recently received MAC's Cyber for my birthday which has been on my wishlist for so long and let me tell you, I plan on wearing the heck out of this.
So Cyber is one of those super dark vampy lip colours that will probably scare off a bunch of people, but those are the colours I absolutely adore. It's dark
dark purple with cool undertones... so yeah, it makes me look like a pale vampire; perfection. It's a satin finish so there's a bit of a glossy sheen to it and it can emphasize dry flaky lips so always remember to prep and exfoliate your lips before applying! I would also advise you to use a lip liner with this just to avoid bleeding.
Here it is swatched in natural lighting. I'd say this is truer to it's colour than it is in it's bullet and in direct sunlight. I find that the colour may change slighting in different lighting, looking more saturated in bright light and more towards a black-purple in low lighting. The bullet looks more of a blue-purple.
Here's a close up lip swatch in direct bright natural lighting. I was facing a window on a very sunny day when I took this and I'd say this colour looks more like the bullet colour.
I also took a picture with it on in natural lighting again, but on a less sunny day. Depending on the number of layers you put on, I think you can sheer this colour out to make it less dark and more wearable.
Rating: ★★★★★ 5/5
Overall, I loveeee this lipstick and I actually like how the colour differs in different lighting. This is my first ever MAC product and I'm so tempted to buy other lipsticks!
Labels: cosmetics, lipstick, mac, makeup, review
2015 Favourite Lipsticks
Hi cuties!
I've been on such a lipstick craze lately and decided to do a favourites post. These are the colours that I've been loving on my lips lately. Most of these are from the drugstore. Lipsticks are really addicting to collect because drugstore ones are only a couple of bucks each so I have a habit of purchasing one every time I see one on sale at the drugstore.
I'm thinking about trying Maybelline's Vivid and Rebel Bloom collection but those colours were a little out of my comfort zone. Maybe I'll drag a friend along and swatch with me until I find one that I think will look good on me. I want a really bright vibrant colour for the spring this year!
Anyway, here's a bunch of swatches to give you an idea of some of the shades I lean towards.
1. Rimmel London Provocalips in Little Minx
This is my very first bright fuschia colour. I've always been afraid of this colour but at the same time so intrigued so I bit the bullet and got it with my fingers crossed. It turned out to be such a fun colour on me! I also love the 16hr formula of this product.
2. Rimmel London Provocalips in Heartbreaker
Another 16hr Provocalips! It looks a little more brown in the picture but in real life it's a little more red toned. I'd say this is one of the very few warmer toned colours I own.
3. MAC Lipstick in Cyber
Ah, the famous Cyber! The swatch doesn't do it real justice, it's more of a dark purple. This lipstick is sooooo love. You'll feel like a badass wearing this.
4. Rimmel London Lasting Finish by Kate Lipstick in 111 Kiss of Life
This is the perfect red for me. It's a cooltoned matte red that every girl needs in her collection. So happy it's a cheap drugstore product, yet it lasts a long time on my lips without drying!
5. Revlon Colourburst Matte Balm in Shameless
This is straight up purple, similar to MAC's Heroine. It's super pigmented and cooltoned but doesn't stain your lips.
6. Maybelline Colour Sensational Creamy Mattes Lipstick in Touch of Spice
This is the colour I've been reaching for the most lately. It's a dusty red and it's such a nice colour on the lips when you want something red but nothing too bright. I call this my "nude red".
7. Maybelline Colour Sensational The Buffs Lipstick in Truffle Tease
Truffle Tease is my favourite nude because it's a brown-nude that a little darker than my skintone so it doesn't make me look dead. The formula is also really creamy and hydrating on my lips.
8. Maybelline Colour Sensational Lipstick in Blissful Berry
This is another purple colour but I'd say it's more like if Shameless and Little Minx had a love-baby. It's a purple berry colour that is good for the fall. It's also has a bit of a sheen to it that I don't particular mind even though I prefer mattes over any other finishes.
What are your favourite lipstick shades? Got any recommendations? Own and love any of these colours? Let me know!
Labels: cosmetics, favourites, lipstick, mac, makeup, maybelline, revlon, rimmel
Kat Von D Spellbinding Eyeshadow Book Review
Heya cuties,
So I'm finally writing a review on the
Kat Von D Spellbinding Eyeshadow Book! Spoiler alert, let me just say this now, I am in love with this.
I adore Kat Von D a lot. As an artist and just a rad girl all around, she's one of the people that I idolize and sometimes I look at her and I think to myself, 'damn I wish I was her'. My cousin went to her shop to get a tattoo and met Kat and said that Kat is one of the nicest and most humble people she has ever met. I really appreciate that about her. Her being an art-based person really gives me a deeper connection because I'm also an art-based person so I know whatever she comes out with is really artsy.
So let's talk about packaging because you can't mention Kat Von D and not talk about packaging. One thing that I love about this pallet is that the illustrations and designs for her products are all personally drawn by her. The drawing on the front of the pallet alone is just so beautiful, isn't it? Her style is definitely right up my ally. This is the front of the box it comes in, but the pallet is the exact same thing but with a black boarder. The back
(on the box), features all the colours in a grid.
What's different about the pack on the actual pallet is that this has a "chart" that shows colour combinations you could do. I think one of the main points of these shadows are that you could mix two shadows together and it'll form a completely different shade.
How to use: Each set of shades are paired together to create perfect layered looks. Apply "Geek" on lids, then blend "Fallen" on top for a bronzed peach shadow. For a completely different look, apply "Fallen" on the lids, then blend "Geek" on top for a perfect golden shadow.
This is what it looks like when you first open it up. There are three diagrams of three different looks you can try out. There's also a clear film over the top of the shadows with their names printed on top. I find that this is a little bit annoying to hold back when you're trying to use the shadows, but I guess it is helpful for not getting shadow all over the top of the lid.
Here's an overview of all the names. The ones with a star next to the names are "never before seen" shades. As you can see, there are quite a few of this some it makes getting this pallet really worth it since there wouldn't be too many repeats of other shadows you might already have.
At first glance, my favourite shades were
Oddfellow (black with teal glitter),
Queen (a redish brown-green duo chrome),
Wonderland (dark plum with pink glitter), and
WTF (bright red with purple-ish undertone). After using this pallet for a while, the colour that I grew to love was
Smile Now because it looks like an orange-peach colour but when applied on the lids, it actually has a pink duo-chrome action going on. I really like this as an inner corner highlight because when the light hits it in an angle, it's pink.
This is definitely a pretty colourful pallet, but I think it's very good for someone who is just starting to use brighter colours, like I am. I'm not all for the full-on-bright-colours-all-over-the-eyes but I like a hint of colour here and there or different tones of neutral-ish colours. For example, sometimes I use a red-ish shade like
Stupid Audocorrect in my crease as a transition shade instead of a standard taupe or brown. Or sometimes I use a combination of the greener shades like
Gunner and
Hexagram with a golden shade to highlight like
Sunset Blvd or
Precious.
Hexagram is an olive-green type shade that is a little more neutral than a straight up green so it's easy to work with without making your eyes look like a rainbow of colours, while
Gunner is a very saturated green to give it that pop of colour. The one shade I haven't really used is
Bukowski, which is that one bright blue on the bottom, only because I really don't rock blue very well without looking like a hooker. I have one other bright blue shadow in my collection and I don't even use that one either so I don't know how I'm going to use this one.
The texture of these shadows are super buttery smooth. Just swatching them with my fingertips felt like a dream because they were just so soft. The pigmentation is excellent, but I would use an eyeshadow primer under them just so the colours are as pigmented as they can be and to ensure they last all day and don't crease. In terms of fallout, the darker colours, especially the ones with glitter, tend to have a bit of fallout. It's not a crazy amount, but I'm assuming you tap off the extra on your brush before applying like you should be doing. Speaking of tapping off the excess, when you do so, you'll see that a ton of it comes off of the brush. I think due to how soft and finely milled these shadows seem to be, this translates to a lot of potential fallout. Having said that, I would imagine that this means you will use up these shadows pretty quickly if half of it is fall out that you can't press back into the shadow. That's just loose powder being blown everywhere! That's something you should keep in mind.
Another thing I want to mention is that the golden shades,
Precious and
Sunset Blvd (especially Precious), seem a bit powdery. It's almost hard to get them on the lid without packing them on a ton.
The thing that I love most like I've mention before is that a lot of these shadows seem to be duo-chrome
(which I've always love love LOVED) and what makes them so special is that you can layer them to get a different shade! Now, I'm not talking about like mixing a blue and a green will give you an orange (that's not even possible to begin with), but something like
Birdcage and
Gunner layered on top of each other makes a grassy-lime green. This also means that blending these colours into each other is a breeze because the overlap will be an automatic transition colour! Honestly, I think this is really what makes this pallet so unique.
I got this eyeshadow book as a birthday present this year but I know Sephora sold it for around $55 or so. I'm not sure if they still sell it now because I don't see it on the Sephora website anymore but if you really want to pick this up, try walking into the store to see if it's there and if not, maybe eBay will be your next best bet.
Rating: ★★★★☆ 4/5
I really want to give this a perfect score but as reviewed, there are some cons to this pallet so I cannot give it 5/5. Although I has quickly became one of my favourites, next to the Naked 2 pallet. This is my first ever Kat Von D cosmetic item and it has definitely given me an excellent impression on the quality of her products. I'm curious and excited to try out a few of her items in the future!
Labels: cosmetics, eyeshadow, kat von d, makeup, review
January 2015 Favourites
Hi cuties,
I've never done one of these kinds of posts before but I wanted to show you a couple of items I've been loving for the past month. I don't think I'll make this a monthly thing because I don't buy new products too often, but maybe I'll try and showcase an item or two whenever I find ones that I really like! So here's what I've been loving so far.
Skin79 Super Plus BB Cream (purple)
I've used almost all the Skin79 BB Creams; pink, gold, orange, green
(tested), and now purple! I have to say the purple version is by far my favourite one. I use to really love the gold one because it was for dry skin and also has that grey tone (which I actually like because I'm cool toned!) but the purple is like the gold version but on crack; it's so much more moisturizing!
Tangle Teezer
This thing has been around for a while and I remember everyone raving about it. I never use to comb my hair until I started bleaching my hair. Now I get tangles all the time and this literally saved my life. Not only does it get all the tangles out, I can use this on my wet hair which makes drying my hair so much faster without my hair looking poofy after a blow dry.
The Face Shop Mango Seed Silk Moisturizing Facial Butter
Anyone with dry skin will love this product. It's a heavy duty facial butter that seriously keeps your skin moisturized for hours and hours. It's recommended to be used as a night cream but if you're like me with extremely dry skin, a thin layer of this under your foundation will keep your skin from drying out throughout the day.
Z.One Concept Milk_Shake Leave In Conditioner
My hairstylist friend Mike introduced me to this product. He always uses it in my hair after he washes it and it makes my hair much more manageable especially after all I've done to my hair. I use it daily and douse my hair with it. I even bought a second bottle! The best part is that it smells like cupcakes!
Tony Moly Pocket Bunny Moist Mist
I've had this product for a long time now and I recently rediscovered it. I love spraying this on my face before applying bb cream and it gives me such a dewy finish. It's good to spray on top of your makeup to set it and throughout the day to freshen your face when it's feeling dry.
Carmex Original Moisturizing Lip Balm (tube)
This stuff is heaven sent. I have extremely dry and flaky lips and this stuff has healed my lips up really good. I especially like the tubed version. I think it's extra strength because the instructions on the back says not to use it more than 3-4 times a day. I use this in the morning right before applying makeup and at night right after I shower/before bed.
Innisfree Water Glow Cushion
I just did a review on this product so you guys all know how much I love this thing. I've been using it every day since I got it and it has kept my skin moisturized without looking cakey and gives my skin a brightening glow. Big plus for being super convenient for travel and fast application.
So there are all my favourites for the month of January. I've recently bought some new products that I love but that will have to be saved for another post for a later time! Tried any of these products? Love something else? Let me know!
Labels: cosmetics, favourites, innisfree, makeup, skin79, tangle teezer, thefaceshop, tonymoly, z.one
Innisfree Water Glow Cushion Review
Hey cuties,
I'm super excited to be doing this review right now! A little back story: my friend introduced me to her IOPE/Amore Pacific
(I can't remember which one she has) cushion and raved about how cushion foundations are really great and handy. I've heard about them from Youtube and Korean beauty blogs but never really paid too much attention to them until now. This is my first cushion foundation and I wasn't too sure how I'd like it so I went with a cheaper alternative to the higher end Hera/IOPE/Amore Pacific route and got Innisfree!
This is also my first Innisfree product and spoiler alert: I'm impressed!
I believe Innisfree's most famous cushion is their Long Wear Cushion (matte), however I went with the Water Glow (dewy) version because I have dry skin!
I haven't seen many reviews for this product so I hope you enjoy :)
Front
Back
Side 1
Side 2
Top
It comes in a paper packaging which feels like it's made from recycled paper. On a design standpoint, I really like how they added icons on the side for some quick indications of some of the benefits of the product. The only thing I found funny is that they printed their front cover sideways of everything else.
I got the colour #23 True Beige which is the darkest of the three available shades. One thing I noticed when I was researching this product was the colour swatches Innisfree gives you of each shade is totally misleading. It looked like #23 would be really dark, tan, and yellow toned which was a huge worry for me since I wouldn't consider my skin to be all that dark, and I'm definitely more cool toned (yellow undertone but with a cool tone). My friend who is much paler than I am, reassured me that the other two colors would be way too pale for me and to just go with the darkest shade and so I did. More on that to come!
The compact itself it very sleek and simple. It fits nicely in the palm of my hand and isn't too thick or heavy to travel with. This will be perfect on the days I'm over at my boyfriend's house and do not want to bring a whole bottle of foundation + brushes.
The back has all the specifications: name, colour, manufacture date, and product amount. You get 15g of product per cushion and they are also refillable so you don't have to keep buying new compacts. It has a 12 month expiry life but I'm pretty sure you'll need to buy a new refill after 2-3 months if you use it daily.
The Water Glow cushion has SPF 50+ and PA+++ which I've found pretty standard for Korean BB/CC/foundation.
When you first open the compact, you'll find that it has a mirror and a sponge. This might seem random but the first thing I noticed was how clear this mirror is. I've never seen a mirror inside a makeup product so clear and sharp. Even the mirror in my Naked 2 palette doesn't compare to this mirror and I find it super useful to use on the go.
The sponge is really the star of the show. This is the key to getting the perfect application of foundation on your skin. The texture of the sponge isn't like any other sponge I've ever felt and although I've never felt the Beauty Blender before, I have a feeling they are made of the same material. It's soft, airy, and the pores on it are super tiny so it doesn't absorb too much product.
There's a plastic cover that keeps the cushion air tight and separates the sponge from the product to reduce bacteria. If you're concerned about the sanitary factor of using a sponge, don't worry; you can wash these sponges. There are a couple of helpful videos on Youtube showing you how to get them super clean and the best way I've found is using a bar soap.
When you first open the compact, there's a film that seals the product which you remove before using. I guess this is to show that it hasn't been tampered with.
To get the product, you have to press down into the cushion. As you can see, the product itself is much lighter than the cushion itself which is very misleading when people are trying to choose shades! Always keep in mind that Korean girls have super pale skin so all their foundations are in the lighter side of the spectrum.
When swatched on my hand, you can see the difference between my cool skin tone versus the warmer tone of the foundation. It also has a light texture. It's not quite watery but it's not too thick like say Skin79's purple BB cream which has a gel-like texture.
After I tapped/blended it out with the sponge, it blended into my skin quite nicely. I was surprised to find that it was a good colour match for my face. Although it is slightly warm toned, it neutralized my skin tone well and gave a brightening affect.
The coverage for this foundation is light to medium. It's definitely build-able and gets better the more layers you apply. I usually do an overall application and go back with a second layer on areas that need higher covers like around the nose and on my dark circles.
Overall I am very impressed by this product and I've been using it every day since I got it. I got mine on eBay for around $26 CAD while the cheapest refill I've seen goes for $17-18. This has been a very pleasant introduction of cushion foundations and I'm eagered to try other brands!
Rating: ★★★★★ 5/5
xoxo.
Labels: cosmetics, cushion, foundation, innisfree, korean, makeup, review
Profile
stupid princess
 UserName:
 Hyokii
Age: 23
Birthday: January 22
Location: Toronto, Canada.
Sign: Aquarius Sun, Gemini Moon, Aries Rising
Who are you?
I'm just an average girl studying graphic design in my hometown Toronto. I'm nothing special but I like to blog and document my findings :) I'm really into astrology so come and tell me your sign!
What do you blog about?
Mostly just about my life and occasional beauty hauls and product reviews.
What does 'babo gongju' mean?
It's Korean for 'stupid princess'.
Boyfriend?
Yes! He does Muay Thai and he's a Virgo.
Tell me about your skin type!
I have extremely dry dehydrated skin and really dry/flaky lips. Light; yellow with neutral leaning cool undertone. Currently wearing NARS Sheer Glow in Gobi.
Up Coming
A List of posts that are coming soon
Reviews:
Tonymoly Cats Wink Smooth Primer
Etude House Goodbye Pore Ever Primer
Skin Food Choco Smoky Eye Palette
Aussie 3 Minute Miracle Shine Deep Treatment
Real Techniques Core Collection Brush Set
Etude House Golden Ratio Contour Maker
Skin Food Coffee Creamy Sheer Lipstick (PP701 Plum Wine)
Etude House Real Art Cleansing Oil (Moisture)
Skin Food Bath Salt (Peppermint)
Etude House Miss Tangerine Cream Choux Blusher
Skin Food Red Orange Makeup Finish (Matte Type)
Tonymoly Cat Chu Wink Tony Tint (Cherry Pink)
Etude House Etoinette Crystal Shine Lip Lipstick (PPK001 & PPK003)
Etude House Etoinette Brush Collection
The Face Shop Rice Water Bright Cleansing Special Set
The Face Shop Cotton Pads
The Face Shop Face It 07 Quick Top Coat
The Face Shop Lovely ME:EX Design My Eyebrow (01 Gray Brown)
The Face Shop Lovely ME:EX Style My Eyebrow (01 Gray Brown)
The Face Shop Face It Designing Cake Eyebrow (01 Khaki Grey)
Etude House Dear My Blooming Eyes (OR203 Mesmerizing Orange)
Nicole by O.P.I. Nail Polish (Iceberg Lotus)
The Face Shop Real Nature Mask Aloe Vera
The Face Shop Face It Styling Auto Gel Liner (01 Edgy Black)
The Face Shop Floral Water Mist
The Face Shop Mild Papaya Peeling Gel
Kat Von D Spellbinding Eyeshadow Book
Rimmel Lasting Finish Matte Lipstick By Kate Moss (111 Kiss Of Life)
Rimmel Lasting Finish Matte Lipstick By Kate Moss (102)
Sally Hansen Big Matte Top Coat
Witchcraft Mini+Cures Set
Maybelline Volum’ Express The Colossal Smoky Eyes Mascara
Nicole by O.P.I. Quick Dry Top Coat
Essence Kalinka Beauty 01 Babushka Me Lip Brush
Maybelline Volum’Express The Rocket Waterproof Mascara
Maybelline Eye Studio Master Drama Eyeliner in Midnight Master
Maybelline Fit Me Concealer in 10 Light
Maybelline Dream Lumi Touch Highlighting Concealer in Ivory
Etude House Nymph Aura Volumer (sample)
Etude House Mal;Gem All In One Emulsion (sample)
Etude House Mal;Gem Smoother Toner (sample)
Etude House Sun Prise Super Aqua SPF45/PA+++ (sample)
Etude House Precious Mineral BB Cream SPF30/PA++ (sample)
Etude House Moistfull Collagen Firming Eye Cream (sample)
Skin Food Platinum Grape Cell Essential BB Cream SPF45/PA+++ (sample)
Skin Food Agave Cactus Emulsion (sample)
The Face Shop Chia Seed Moisture-Holding Seed Cream(sample)
The Face Shop Mango Seed Silk Moisturizing Toner(sample)
The Face Shop Mango Seed Silk Moisturizing Lotion(sample)
Updated The Face Shop Mango Seed Silk Moisturizing Toner & Lotion (full size)
The Face Shop Mango Seed Silk Moisturizing Facial Butter(sample fullsize)
The Face Shop Volcanic Clay Black Head Aloe Nose Strip(sample)
The Face Shop Herb Day 365 Cleansing Foam Acerola (sample)
The Face Shop White Secret Whitening Body Essence (sample)
Tutorials & Tips:
How I Contour My Face
Tips On How To Drink More Water
2013 Summer/Fall Wish List
My Current Everyday Makeup Tutorial
Friends
Love'em, Hate'em
 Jin
Jin

Bucket List
before the end
. Put a lock on Seoul’s Namsan Tower's fence
.
Visit the beach; any beach (063011)
. Party hard
.
Starbucks date (072310)
. Learn to drive
.
Star gaze (062812)
.
Road trip (Summer`09)
.
Be loved
. Visit South Korea
.
Wedding; anyone's wedding (10.13.13)
.
Be happy
.
Bake cupcakes from scratch (04.06.10)
.
Ride a motorcycle (08.21.14)
. Get my first tattoo
.
Kiss in the rain
.
Pull an all nighter
.
Belly button piercing (02.19.14)
. Disney world/land
. Anime North
.
Cosplay Rin
. Cosplay X-23
.
Princess Cafe date (12.10.12)
.
VVIP album(02.20.11)
. Visit Hong Kong again
. Graduate university
. Paris
to be continued...