What's In My Makeup Bag
Hi cuties! I've been staying over at my boyfriend's pretty often recently and every time, I always make sure to pack the most essential makeup items in my bag. Who knew I still needed so many products?! Luckily, they all fit nicely in my tokidoki makeup bag
(that I still absolutely adore, by the way) with a little extra room to spare.
Today I'll be showing you each and every item that I carry in my makeup bag, as well as some tips for packing light! So, let's get into it.
First thing is first: the makeup bag. I got my tokidoki makeup bag from Sephora back when they were still carrying tokidoki products. I wouldn't really consider myself a "brand name" kind of girl but
tokidoki is one of the brands I absolutely adore and love to collect. The dimensions are 8x3x2" which is a pretty decent size that's easy to travel with on a daily basis to carry your most essential products with you.
Tip #1: Think about what is most important to you when it comes to makeup. For me, I put most of my emphasis on my eyebrows and eyes, more specifically eyeliner and lashes. By doing so, you can cut back on the products targeting the areas you emphasis less on. I can get away with no foundation and just using a concealer for my face.
Tip #2: Samples and travel size are your friends! It's no surprise that packing light means packing small. You know that row of travel sized products right at the cash out line in Sephora? Take advantage of that!
Tip #3: Stick forms and compacts with applicators. No one wants to carry around oddly shaped items that will waste space in your bag. I like picking items in stick form because they're usually small enough for traveling. Also, who wants to carry a bunch of brushes around? Not me, so those sponge applicators, although lower quality, still are functional and is the best option when brushes are not an option. When traveling, I usually pick products that I can use my fingers with: blending concealer with fingers, one wash of colour on the lids with my fingers, cream highlighters, etc.
Alright, now let's get into the products.
Rimmel London Lasting Finish Blush in 018 Pink Sorbet: this colour just goes with just about any makeup look I do. It's a nice peachy pink with an almost matte finish. It also comes with a mini brush so it's so handy to carry around.
Rimmel London Colour Rush Eyeshadow Quad in 002 Smokey Brun: a very neutral quad with a good range of tones from light to dark. Again, applicators, yay!
Maybelline Mega Plush Volume Express Waterproof Mascara: I bought this to test out a new mascara. Great length for those "natural no makeup makeup" days.
Maybelline The Rocket Waterproof Mascara: I just carry this one around if I want to add more volume to the first mascara. It also does wonders for my lower lashes.
Too Faced Shadow Insurance: I can't do any look without my eyeshadow primer, period.
Essence Kajal Pencil in 04 White: just a standard white eyeliner to brighten my waterline on days when I'm looking tired and dead.
Essence Lip Liner in 08 Red Blush: a purplish red lipliner. Lipliners are awesome because they could be used on their own or under a lipstick.
The Face Shop Style My Eyebrow Pencil in 01 Grey-Brown: for filling in the front and middle of my brows.
The Face Shop Design My Eyebrow Pencil in 01 Grey-Brown: for filling in the ends of my brows, plus it includes it's own brush on the end. This one is also slightly darker than the other even though they're technically in the "same colour".
The Face Shop Colour My Eyebrow in 01 Grey-Brown: tinted eyebrow gel to lighten my brows and keep them in place.
Maybelline Master Drama Eyeliner in Midnight Master: creamy black eyeliner for the waterline and tight-lining. I rarely use it to actually line my upper lids but maybe one day?
K-Palette Real Lasting 24h Waterproof Micro Eyeliner in 01 Black: liquid eyeliner is definitely my favourite to travel with because it's sharp, precise, and you don't have to carry a separate brush.
Maybelline Fit-Me Concealer in 10 Light: the only product I carry to add coverage to my complexion.
Benefit Watts Up Highlighter: I got this one year for my Sephora birthday gift. It's mini and a cream product that's so convenient to use on the go.
Urban Decay Lip Junkie in Naked: Sample size I got from my Naked 2 pallet. Very handy when you want gloss without carrying a whole tube of it.
Makeup Forever Lipstick in Rouge: Another one of those Sephora birthday gifts. A good pinky nude that's mini and compact.
The Face Shop Designing Cake Eyebrow in 02 Khaki Grey: a grey-toned eyebrow powder pact with a handy mirror and two applicators perfect on the go. I also sometimes use these shadows to contour.
Covergirl Brow&Eye Makers Pencil in 505 Midnight Brown: I've used this to a nub. For days I want super brown brows or brow eyeliner. It's kinda useless but it's so small now that it makes no difference if I have it or not.
tokidoki Rollerball Perfum in Aideu: one of my favourite scents to wear! The decorative top came off the lid so it's now really convenient to carry around for when I want to smell fresh.
Maybelline Color Sensational Lipstick in 930 Truffle Tease: my favourite nude lipstick to date! Hydrating, pigmented, and goes with any look.
Bic Lighter: for emergencies because you just never know. I don't smoke.
Tweezerman Eyelash Curler: speaks for itself.
Bobby Pins, Hair Ties, Hair Clip: Because yes.
That's all the products I carry around with me almost everywhere! This is how much I need to complete an almost full face of makeup. When I'm missing is a contour product. I'm thinking of picking up one of those Maybelline Fit-Me Stick foundations in a darker shade to use as a contour. What do you think?
How much do you carry with you? What are the areas you love to focus on most when doing your makeup? Leave me a comment, I would love to know!
Labels: cosmetics, makeup, tips, travel
Belly Button Piercing Update: June 2014
So it's been almost 5 months since I got my belly button pierced. I got it middle-to-end of February this year. This piercing takes from 6 to 12 months to fully heal, so I still got a long way. By the way it's been looking, I know it won't be fully healed by 6 months.
Around the 4th month mark, I started to clean it less, which I shouldn't have done. I use to do sea salt soaks twice a day and clean it with Original Neutrogena every day in the shower. I went down to 1 soak in the morning and 1 cleaning in the shower, to just cleaning it in the shower. This was probably a mistake because I started to get a keloid at the top of my piercing. Keliods are very common with surface piercings, and my cousin's wife even got one while hers was healing. She told me to crush some aspirin and make a paste with a few drops of water. Keep it on the piercing over night and wash it off in the morning. It started working and my keloid went down slowly. I also heard that some people add some sea salt in the mixture, so I did that and it went down significantly! I'm now back to doing 1-2 soaks during the day and a cleaning in the shower at night.
Another thing that happened was that my piercing has migrated a little to the side. Migration is pretty common as well and there's not much you can do about it. It doesn't help that I have a slanted navel, anyway. I don't mind it, but I know others have gotten it redone for this very reason. I'm sure the keloid had some part in pushing it over to one side.
So no real infection yet, other than the nasty keloid which wasn't very pretty at all. I did accidentally knock it by accident sometimes and it has started bleeding from rough physical activity like dancing and working out, but that was about it. Belly button piercings are not a pretty piercing while it's healing, but give it some time and be patient. Remember that the piercing heals from the outside in, so it may look healed on the outside but it's still healing in the inside!
Here's what it currently looks like. You can see the red keloid next to the top ball, but it has gone down significantly from before. It was crusting and scabbing a lot before I soaked and did the aspirin paste on it.
You can see the piercing clearly slants to one side, but I'm hoping that once the keloid goes away, it wont slant as much. It doesn't bother me that much though. I wouldn't redo it just to get it straight again. The same thing would probably happen.
So this is my 4-5 month update. I'll probably do another one in a couple of months just to see where I'm at again.
Labels: belly button, piercing, tips
Belly Button Piercing
Today I'm going to be talking about my belly button piercing. I'll tell you my experience while getting it, where I got it done, and some aftercare information for those who want to get it done. Let's start off by showing you my piercing!
This is what it looks like currently. It's in the process of healing still since I got it only about a month ago.
This is taken right after I got it done.
And this is what it looked like the day after.
Why did you get it done?
For many years, I've always wanted a navel piercing. The first time I've seen a belly button piercing, I knew I wanted one for myself. I think it's really feminine and cute! I love wearing crop tops and showing some midriff, even if some people think "that's so 90s" haha. Plus, I have a bit of a special belly button as it is not quite and innie and not quite an outie, which I adore :) Two of my cousins have one and so I was basically next in line to get one too! In addition to that, I think it's because of the whole breakup thing that got me to decided to just go ahead and do something "slightly" rebellious.
(I was in a very 'fuck it' mood that week) I hardly consider it rebellious, but other people have told me that's what they think haha. Regardless, I did it for myself and it was long overdue.
Where did you get it done?
I got it done at
New Tribe, downtown Toronto. Three of my cousins have gotten their piercings done there too and it's pretty decent place. It's right across from Much Music, on the second floor, so you can't miss it. Fun fact: it was opened the same year I was born!
What was it like? Did it hurt?
After asking several people about their experience with getting their navels pierced, most of them said that the clamp hurts more than the piercing itself. I went into it not nervous or scared, I was more excited than anything else. I'm not really scared of getting piercings, but getting needle shots do freak me out. Strange, I know.
So the guy that did my piercing is named Shayne. He brought me into the room and told me to roll up my shirt just so it wont get in the way. Pro tip: don't wear tight clothing! Then he had me stand up straight with my legs together and hands by my side, looking straight toward. He asked me if I wanted to get the upper or lower part pierced. I don't have much meat on my belly so he said the lower part would be much easier, but the upper part is still do-able so I chose the upper. He marked off the spots and had me make sure it was straight and if the placement was okay. Then I laid down and he started to clamp the area. The clamp did hurt a bit. He had to do it extra tight for me because I hardly had any flesh to grab onto. The pain for the clamp wasn't too bad though. I would say it's a 5/10. Then he took the needle and told me to take a deep breath. I've seen it being done many times and usually they do it pretty fast, but Shayne took his sweet ass time haha! I felt like he was going super slow and I definitely felt the needle pierce through me
(not to scare anyone!). The pain level was like a 7.5 or so. To me, it felt similar to getting a needle injection from the doctor, which hurts in my opinion! But everyone is different. After he pierced me, he slide the barbell in and screwed on the top, and then it was over. The whole process only took about 10 minutes. You're literally in then out.
Afterwards, it did hurt a tiny bit; more like being sore. There would be sudden bursts of soreness here and there but it's nothing horrible. For the next week and a half after getting it done, it was a little sore throughout the day. I especially had a hard time with sitting down because my pants would always push onto it or something like that.
Aftercare information and how I take care of my piercing
So aftercare is very important when it comes to piercings. Navel piercings are very easy to get infected so you're going to want to make sure you clean it was well as possible. It takes roughly
6 months to a full year before your piercing is completely healed and you're going to want to keep cleaning it until it's fully healed. There are different ways you can clean it, but you're generally going to want to clean it 2-3 times a day. Make sure you don't over clean it as well, or that will dry out your piercing.
One way of cleaning is to get this saline solution called
H2Ocean Piercing Aftercare Spray. You can get it at most piercing shops and also at Hot Topic or online. You're going to want to spray the area down, then take a Q-tip, spray some solution on that, and go around your barbell on the top and bottom, then dry the area.
Shayne gave me an aftercare card that tells me to use mild soap without colour or perfumes and
NOT anti-bacterial. Some examples of soaps you can use are Glycerine soap, Original Neutrogena
(which is what I use) and Spectro Gel.
What you're going to want to do is lather the soap on your piercing and area the area to clean it. Then turn and move the piercing around so the soap gets in there to clean out any discharge. After, rinse everything off and make sure you get all the soap from inside out too. You can do this twice a day, and again, make sure you don't over clean because it can cause irritations. I do this every night when I take a shower, along with a combination of the next method, which is sea salt soaks.
So instead of getting the spray, you can make your own saline solution with
non-iodized sea salt. Make sure it is not normal table salt because this contains iodine which can irritate your piercing. You're going to want to take a 8oz cup of hot or warm water with 1/4 teaspoon of sea salt. Yes, that is a tiny amount but too much salt will also dry out and irritate your piercing! What I do is put that solution in a shot glass and flip the glass over the piercing so it is submerged in all the water. You're going to want to soak for about 5-15 minutes. I usually just do 10 minutes. After soaking, I take a Q-tip, dip it in the solution and clean the barbell from top the bottom. Then I take another Q-tip to dry the barbell and the area around it. I do this 2-3 times a day, and even after I showered and cleaned it with the soap.
Please
do NOT use alcohol on your piercing because it's way too harsh! Sea salt soaks are the best because the sea salt will help it heal faster and clean out an infection. Only do the above methods to clean your piercings, unless your piercer says otherwise. If you think you have an infection or not sure about anything, your best bet is to contact your piercer and ask because they'll know what to do.
Here are some jewelry that I really want to get once mine heals!
I want a full black titanium one for days when I don't want anything that fancy. I think a full black piercing is so pretty and minimalistic.
Belly button jewelry cat by AnnaSiivonen on Etsy! All her stuff are hand-made which is why it's a little expensive but I adore her style! It's so rustic, and I love that it's a cat. She has other ones such as a dog one as well. All her stuff are so unique and pretty.
Arrow Belly Button Jewelry Ring by Azeetadesigns on Etsy. This is a 14 gauge jewelry which means you can use it for your belly button piercing, or eyebrow piercing or just any piercing that requires a 14 gauge jewelry.
Anyway, that's all :) If there are further questions, don't be afraid to leave a comment to let me know and I'll try my best to answer them if I have the answers. In the future, I want an industrial piercing so maybe that will be the next piercing update hehe.
xoxo.
Labels: belly button, piercing, tips, tutorial
How I Contour My Face
Contouring is one of my favourite steps to do when applying makeup. Sometimes when you apply foundation on your face, it may look really flat, but contouring solves that problem! I contour my face 90% of the time when I apply my makeup, except for those super lazy days when I hardly apply any makeup at all. It makes the biggest difference to your face and you can even slim down your face shape a tiny bit!
Products used:
- NYX blush in Taupe (Contour)
- Rimmel blush in Pink Sorbet (Blush)
- Etude House Golden Ratio Contour Maker (Highlight)
- Real Techniques Contour Brush
- Tokidoki Blush Brush
- Small fluffy face brush (no brand, sorry!)
Here's my face without any contouring. It's pretty flat and my face looks super wide and round ;-; I've applied BB cream, concealer and powdered to set everything in place. Now I'm ready to start contouring.
First I start with my bronzer, or in this case, I use NYX's blush in Taupe. I like using this as a contour colour because it is not orange like most bronzers are and it's deep enough to mimic shadows on my face, which is what we're going for. Contour with a colour that suits your skin tone. Don't go for something too orange or warm if you're only looking to slim down your face, as a bronzer is only good for, well, bronzing your face. Also, make sure it's matte with no shimmers what so ever. Shadows aren't supposed to shimmer and the matte texture will look most natural when you take flash photography. Shimmers reflect light, and with contour, you want to create shadows.
When contouring the side of your face, go with the E 3 method, where you'd sculpt our these figures onto your face. I like to focus most of the product on the hallows of my cheeks, just under my cheek bones, and right along my jaw line to slim down my jaw. Then, with whatever is left, I buff some into my temples to slim down my the sides of my forehead.
Don't forget your nose. I find this to be the most important part to contour for my face because my nose isn't as slim as I'd like it to be. I apply some just on the sides of my nose to create a slimmer appearance.
Next, I apply my blush from Rimmel called Pink Sorbet. The colour of blush is really up to you and you can choose one suitable for the makeup look you're going for that day. This is my go-to blush because the colour is a subtle pinky-coral. Smile and apply it on the apples of your cheeks. I also like to drag it up and out to the side of my face to add a little further contouring.

Highlighting is also one of my favourite parts because it goes hand in hand with contouring. When you add shadows, you'll want to add some light as well. Apply your highlighter on any high points of your face. I always put some down the bridge of my nose to make my nose seem taller. Then I add some of the tops of my cheek bones and whatever is left goes on the center of my forehead and chin to create a more 3D illusion to my flat Asian face. Here I'm using Etude House's Golden Ratio Contour Maker, only taking the highlighter portion. I like to use highlighters with a pinky-white tone to them, but a lot of people also like using more warm, champagne highlighters to create a radiant glow. Don't apply too much because you don't want to look like a disco ball!


And now we're done! It's very subtle, but you can see that my face no longer looks washed out and dead, and it's slightly more slim than before. There isn't a huge difference because remember, you want to keep this natural. The key is to blend, blend, blend. But you can definitely do some really heavy contouring with more intense shades for things like face transformations and costumes, etc.
Anyway, I hope you found this somewhat helpful. Happy contouring, and enjoy the magic of makeup!
Labels: blush, contour, cosmetics, highlighter, makeup, tips, tutorial
"Queen B" Makeup Tutorial Using Kat Von D Spellbinding Eyeshadow Book
For my birthday, I received Kat Von D's Spellbinding Eyeshadow Book and I've been using it every day since I got it! I absolutely love the colours and they're all so pigmented. My favourite shades are "Queen", "Oddfellow", and "Wonderland", so I created this look using all those shadows. I hope you enjoy :)
(Click to enlarge)
Labels: kat von d, makeup, tips, tutorial
Tips on how to drink more water
I've never been the type of person that drank a lot of water. In fact, it was really common for me to just drink less than half a glass in the morning and run on that for the rest of the day. You could say I was quite dehydrated. It was always annoying when people nagged me to drink more water as I never felt all that thirsty or the need to drink water. But as time passed, I realized that I should try and force myself to drink more because as you know, water is good for you.
We all know the benefits of water and that it's good for our bodies to flush out toxins and what not. So how do you force yourself to drink more water if it's something that you struggle with, and how much should you drink?
People say that you're supposed to drink at least 8 glasses of water a day. I'm not quite sure how accurate that is, because I believe it's all relative to your body size. A person that's larger and/or taller would naturally require more water than a smaller person in comparison. For someone like me, I don't try to count the number of cups I drink, but rather just try and sip on water all throughout the day if possible. If you find yourself peeing a lot more than usual, you're doing it right :)
Here are some tips that helped me get more water into my system:
#1: Find a cute water bottle!
I know it may sound silly, but I think getting yourself a really cute or cool water bottle will motivate you to drink from it more often. You can carry it around with you everywhere, make it your best friend, and naturally you'll drink more often because it's always in your hands. When I got cups and bottles that I really liked, it made me feel like I wanted to use it more.
I have a reusable Starbucks cold cup tumbler for cold water and drinks, and a travel mug/tumbler for hot teas or coffee. Also, I have a
water bobble which has a mini filter that filters your water as you drink. It might seem useless to other people, but knowing you have a cool filter makes it seem that much more interesting while you drink your water. It's kind of a psychological thing, I guess. Also, if you can't find a water fountain or anything, you can just fill it with water from a tap and you won't have to worry about the water not being clean!
There are other cute bottles you can get like the ones from PINK by Victoria Secret. I've seen these bottles in real life and they are HUGE! You can hold lots and lots of water in them so you don't have to refill so often, and they're great for when you exercise or do sports. You could also get cute ones with your favourite Disney character. I like the design of the Tinkerbell one, but there are many other cute characters as well :)
#2: Straws, straws, straws
Don't you just love straws? If you don't, what's wrong with you? Nah, I'm just kidding. But really, straws are the best. They may seem really pointless and a waste, but having a straw makes sipping water that much more easy and you'll find yourself sipping more often than you would if you were drinking out of just a regular cup or mug. You don't even have to lift up your cup! Try and find reusable ones like the ones they sell at Starbucks for their tumblers, or fun and colourful curly straws.
#3: Ice ice baby
If you're like me, room temperature water is just plain gross. If that's the case, drinking cold icy water makes it that much more refreshing. I love ice in my water. It'll help you cool down in the hot summer days and it'll wake you right up if you find yourself falling asleep in the middle of class. There are many places that sell really cool ice trays that come in different designs and shapes if the regular cubes are too boring for you. I know Ikea sells some cute ones, or go to a novelty store and get ones like shark fins, super hero faces, animals, etc.
#4: Write it down. Make it a goal
If you are one of those people that rather keep track of how much you're really drinking, then keep a water journal! I remember back when I was a kid, my cousin would keep this mini notebook and every day she would write down how much cups she drank by drawing little water drop symbols. You could always just make a tiny little note in your daily planner each day if you don't want to keep a separate journal. Set a daily goal for yourself on how much water you want to drink today and achieve that goal. There are also apps you can get on your phone that will help remind and record how much you've drank.
#5: Lemons, teas, and other flavours
Many people dislike water because of the taste; or lack of. I personally don't mind plain water, but if you just can't stand it, try adding a few drops of lemon juice into your water. It's also good for you since you're adding a bit of vitamin C, right? Or try to drink water in tea form. I don't recommend drinking nothing but tea, but if you're just starting out, you can use tea to ease yourself into adding more water into your body. I suggest drinking teas that don't need milk or sugar because that's adding extra stuff that we don't want. Try to drink tea pure, so it's as similar to water as possible. Another method is getting flavour infusers. Many companies sell these and they can come in crystal form packets or concentrated drops.
#6: "Just water, thanks"
If you're at a restaurant, don't order any fancy drink. Just order plain or lemon water and drink that throughout your meal. You're already eating out, so why don't you do something a little more healthy and skip those sugary drinks.
#7: Don't sweat it.
And lastly, don't make it a chore. Drinking more water doesn't mean you have to drink nothing but water. From time to time, treat yourself to a little soda, or juice, or whatever it is that you enjoy drinking. The key here is to add water into that list of drinks, not let it completely take over. Also, don't stress about drinking 8 full glasses right away. To make it easier on yourself, take it slowly and add a cup more each day. Try and spread these cups throughout the whole day so you don't find yourself drinking it all at one concentrated time.
I hope these tips will help you get more water into your body this year! Water is really something that people don't seem to think about and most people aren't even aware that they're not drinking enough. It might be hard to start, but once you make it into a habit, you won't even have to think about it. Now, I find my body craves a lot more water rather than the regular carbonated drinks I love to drink so much. Do your body some good and drink that water!
*Disclaimer: none of these photos are mine and they've been taken from their rightful online websites. Labels: food, life, tips, water
What's In My Makeup Bag
Hi cuties! I've been staying over at my boyfriend's pretty often recently and every time, I always make sure to pack the most essential makeup items in my bag. Who knew I still needed so many products?! Luckily, they all fit nicely in my tokidoki makeup bag
(that I still absolutely adore, by the way) with a little extra room to spare.
Today I'll be showing you each and every item that I carry in my makeup bag, as well as some tips for packing light! So, let's get into it.
First thing is first: the makeup bag. I got my tokidoki makeup bag from Sephora back when they were still carrying tokidoki products. I wouldn't really consider myself a "brand name" kind of girl but
tokidoki is one of the brands I absolutely adore and love to collect. The dimensions are 8x3x2" which is a pretty decent size that's easy to travel with on a daily basis to carry your most essential products with you.
Tip #1: Think about what is most important to you when it comes to makeup. For me, I put most of my emphasis on my eyebrows and eyes, more specifically eyeliner and lashes. By doing so, you can cut back on the products targeting the areas you emphasis less on. I can get away with no foundation and just using a concealer for my face.
Tip #2: Samples and travel size are your friends! It's no surprise that packing light means packing small. You know that row of travel sized products right at the cash out line in Sephora? Take advantage of that!
Tip #3: Stick forms and compacts with applicators. No one wants to carry around oddly shaped items that will waste space in your bag. I like picking items in stick form because they're usually small enough for traveling. Also, who wants to carry a bunch of brushes around? Not me, so those sponge applicators, although lower quality, still are functional and is the best option when brushes are not an option. When traveling, I usually pick products that I can use my fingers with: blending concealer with fingers, one wash of colour on the lids with my fingers, cream highlighters, etc.
Alright, now let's get into the products.
Rimmel London Lasting Finish Blush in 018 Pink Sorbet: this colour just goes with just about any makeup look I do. It's a nice peachy pink with an almost matte finish. It also comes with a mini brush so it's so handy to carry around.
Rimmel London Colour Rush Eyeshadow Quad in 002 Smokey Brun: a very neutral quad with a good range of tones from light to dark. Again, applicators, yay!
Maybelline Mega Plush Volume Express Waterproof Mascara: I bought this to test out a new mascara. Great length for those "natural no makeup makeup" days.
Maybelline The Rocket Waterproof Mascara: I just carry this one around if I want to add more volume to the first mascara. It also does wonders for my lower lashes.
Too Faced Shadow Insurance: I can't do any look without my eyeshadow primer, period.
Essence Kajal Pencil in 04 White: just a standard white eyeliner to brighten my waterline on days when I'm looking tired and dead.
Essence Lip Liner in 08 Red Blush: a purplish red lipliner. Lipliners are awesome because they could be used on their own or under a lipstick.
The Face Shop Style My Eyebrow Pencil in 01 Grey-Brown: for filling in the front and middle of my brows.
The Face Shop Design My Eyebrow Pencil in 01 Grey-Brown: for filling in the ends of my brows, plus it includes it's own brush on the end. This one is also slightly darker than the other even though they're technically in the "same colour".
The Face Shop Colour My Eyebrow in 01 Grey-Brown: tinted eyebrow gel to lighten my brows and keep them in place.
Maybelline Master Drama Eyeliner in Midnight Master: creamy black eyeliner for the waterline and tight-lining. I rarely use it to actually line my upper lids but maybe one day?
K-Palette Real Lasting 24h Waterproof Micro Eyeliner in 01 Black: liquid eyeliner is definitely my favourite to travel with because it's sharp, precise, and you don't have to carry a separate brush.
Maybelline Fit-Me Concealer in 10 Light: the only product I carry to add coverage to my complexion.
Benefit Watts Up Highlighter: I got this one year for my Sephora birthday gift. It's mini and a cream product that's so convenient to use on the go.
Urban Decay Lip Junkie in Naked: Sample size I got from my Naked 2 pallet. Very handy when you want gloss without carrying a whole tube of it.
Makeup Forever Lipstick in Rouge: Another one of those Sephora birthday gifts. A good pinky nude that's mini and compact.
The Face Shop Designing Cake Eyebrow in 02 Khaki Grey: a grey-toned eyebrow powder pact with a handy mirror and two applicators perfect on the go. I also sometimes use these shadows to contour.
Covergirl Brow&Eye Makers Pencil in 505 Midnight Brown: I've used this to a nub. For days I want super brown brows or brow eyeliner. It's kinda useless but it's so small now that it makes no difference if I have it or not.
tokidoki Rollerball Perfum in Aideu: one of my favourite scents to wear! The decorative top came off the lid so it's now really convenient to carry around for when I want to smell fresh.
Maybelline Color Sensational Lipstick in 930 Truffle Tease: my favourite nude lipstick to date! Hydrating, pigmented, and goes with any look.
Bic Lighter: for emergencies because you just never know. I don't smoke.
Tweezerman Eyelash Curler: speaks for itself.
Bobby Pins, Hair Ties, Hair Clip: Because yes.
That's all the products I carry around with me almost everywhere! This is how much I need to complete an almost full face of makeup. When I'm missing is a contour product. I'm thinking of picking up one of those Maybelline Fit-Me Stick foundations in a darker shade to use as a contour. What do you think?
How much do you carry with you? What are the areas you love to focus on most when doing your makeup? Leave me a comment, I would love to know!
Labels: cosmetics, makeup, tips, travel
Belly Button Piercing Update: June 2014
So it's been almost 5 months since I got my belly button pierced. I got it middle-to-end of February this year. This piercing takes from 6 to 12 months to fully heal, so I still got a long way. By the way it's been looking, I know it won't be fully healed by 6 months.
Around the 4th month mark, I started to clean it less, which I shouldn't have done. I use to do sea salt soaks twice a day and clean it with Original Neutrogena every day in the shower. I went down to 1 soak in the morning and 1 cleaning in the shower, to just cleaning it in the shower. This was probably a mistake because I started to get a keloid at the top of my piercing. Keliods are very common with surface piercings, and my cousin's wife even got one while hers was healing. She told me to crush some aspirin and make a paste with a few drops of water. Keep it on the piercing over night and wash it off in the morning. It started working and my keloid went down slowly. I also heard that some people add some sea salt in the mixture, so I did that and it went down significantly! I'm now back to doing 1-2 soaks during the day and a cleaning in the shower at night.
Another thing that happened was that my piercing has migrated a little to the side. Migration is pretty common as well and there's not much you can do about it. It doesn't help that I have a slanted navel, anyway. I don't mind it, but I know others have gotten it redone for this very reason. I'm sure the keloid had some part in pushing it over to one side.
So no real infection yet, other than the nasty keloid which wasn't very pretty at all. I did accidentally knock it by accident sometimes and it has started bleeding from rough physical activity like dancing and working out, but that was about it. Belly button piercings are not a pretty piercing while it's healing, but give it some time and be patient. Remember that the piercing heals from the outside in, so it may look healed on the outside but it's still healing in the inside!
Here's what it currently looks like. You can see the red keloid next to the top ball, but it has gone down significantly from before. It was crusting and scabbing a lot before I soaked and did the aspirin paste on it.
You can see the piercing clearly slants to one side, but I'm hoping that once the keloid goes away, it wont slant as much. It doesn't bother me that much though. I wouldn't redo it just to get it straight again. The same thing would probably happen.
So this is my 4-5 month update. I'll probably do another one in a couple of months just to see where I'm at again.
Labels: belly button, piercing, tips
Belly Button Piercing
Today I'm going to be talking about my belly button piercing. I'll tell you my experience while getting it, where I got it done, and some aftercare information for those who want to get it done. Let's start off by showing you my piercing!
This is what it looks like currently. It's in the process of healing still since I got it only about a month ago.
This is taken right after I got it done.
And this is what it looked like the day after.
Why did you get it done?
For many years, I've always wanted a navel piercing. The first time I've seen a belly button piercing, I knew I wanted one for myself. I think it's really feminine and cute! I love wearing crop tops and showing some midriff, even if some people think "that's so 90s" haha. Plus, I have a bit of a special belly button as it is not quite and innie and not quite an outie, which I adore :) Two of my cousins have one and so I was basically next in line to get one too! In addition to that, I think it's because of the whole breakup thing that got me to decided to just go ahead and do something "slightly" rebellious.
(I was in a very 'fuck it' mood that week) I hardly consider it rebellious, but other people have told me that's what they think haha. Regardless, I did it for myself and it was long overdue.
Where did you get it done?
I got it done at
New Tribe, downtown Toronto. Three of my cousins have gotten their piercings done there too and it's pretty decent place. It's right across from Much Music, on the second floor, so you can't miss it. Fun fact: it was opened the same year I was born!
What was it like? Did it hurt?
After asking several people about their experience with getting their navels pierced, most of them said that the clamp hurts more than the piercing itself. I went into it not nervous or scared, I was more excited than anything else. I'm not really scared of getting piercings, but getting needle shots do freak me out. Strange, I know.
So the guy that did my piercing is named Shayne. He brought me into the room and told me to roll up my shirt just so it wont get in the way. Pro tip: don't wear tight clothing! Then he had me stand up straight with my legs together and hands by my side, looking straight toward. He asked me if I wanted to get the upper or lower part pierced. I don't have much meat on my belly so he said the lower part would be much easier, but the upper part is still do-able so I chose the upper. He marked off the spots and had me make sure it was straight and if the placement was okay. Then I laid down and he started to clamp the area. The clamp did hurt a bit. He had to do it extra tight for me because I hardly had any flesh to grab onto. The pain for the clamp wasn't too bad though. I would say it's a 5/10. Then he took the needle and told me to take a deep breath. I've seen it being done many times and usually they do it pretty fast, but Shayne took his sweet ass time haha! I felt like he was going super slow and I definitely felt the needle pierce through me
(not to scare anyone!). The pain level was like a 7.5 or so. To me, it felt similar to getting a needle injection from the doctor, which hurts in my opinion! But everyone is different. After he pierced me, he slide the barbell in and screwed on the top, and then it was over. The whole process only took about 10 minutes. You're literally in then out.
Afterwards, it did hurt a tiny bit; more like being sore. There would be sudden bursts of soreness here and there but it's nothing horrible. For the next week and a half after getting it done, it was a little sore throughout the day. I especially had a hard time with sitting down because my pants would always push onto it or something like that.
Aftercare information and how I take care of my piercing
So aftercare is very important when it comes to piercings. Navel piercings are very easy to get infected so you're going to want to make sure you clean it was well as possible. It takes roughly
6 months to a full year before your piercing is completely healed and you're going to want to keep cleaning it until it's fully healed. There are different ways you can clean it, but you're generally going to want to clean it 2-3 times a day. Make sure you don't over clean it as well, or that will dry out your piercing.
One way of cleaning is to get this saline solution called
H2Ocean Piercing Aftercare Spray. You can get it at most piercing shops and also at Hot Topic or online. You're going to want to spray the area down, then take a Q-tip, spray some solution on that, and go around your barbell on the top and bottom, then dry the area.
Shayne gave me an aftercare card that tells me to use mild soap without colour or perfumes and
NOT anti-bacterial. Some examples of soaps you can use are Glycerine soap, Original Neutrogena
(which is what I use) and Spectro Gel.
What you're going to want to do is lather the soap on your piercing and area the area to clean it. Then turn and move the piercing around so the soap gets in there to clean out any discharge. After, rinse everything off and make sure you get all the soap from inside out too. You can do this twice a day, and again, make sure you don't over clean because it can cause irritations. I do this every night when I take a shower, along with a combination of the next method, which is sea salt soaks.
So instead of getting the spray, you can make your own saline solution with
non-iodized sea salt. Make sure it is not normal table salt because this contains iodine which can irritate your piercing. You're going to want to take a 8oz cup of hot or warm water with 1/4 teaspoon of sea salt. Yes, that is a tiny amount but too much salt will also dry out and irritate your piercing! What I do is put that solution in a shot glass and flip the glass over the piercing so it is submerged in all the water. You're going to want to soak for about 5-15 minutes. I usually just do 10 minutes. After soaking, I take a Q-tip, dip it in the solution and clean the barbell from top the bottom. Then I take another Q-tip to dry the barbell and the area around it. I do this 2-3 times a day, and even after I showered and cleaned it with the soap.
Please
do NOT use alcohol on your piercing because it's way too harsh! Sea salt soaks are the best because the sea salt will help it heal faster and clean out an infection. Only do the above methods to clean your piercings, unless your piercer says otherwise. If you think you have an infection or not sure about anything, your best bet is to contact your piercer and ask because they'll know what to do.
Here are some jewelry that I really want to get once mine heals!
I want a full black titanium one for days when I don't want anything that fancy. I think a full black piercing is so pretty and minimalistic.
Belly button jewelry cat by AnnaSiivonen on Etsy! All her stuff are hand-made which is why it's a little expensive but I adore her style! It's so rustic, and I love that it's a cat. She has other ones such as a dog one as well. All her stuff are so unique and pretty.
Arrow Belly Button Jewelry Ring by Azeetadesigns on Etsy. This is a 14 gauge jewelry which means you can use it for your belly button piercing, or eyebrow piercing or just any piercing that requires a 14 gauge jewelry.
Anyway, that's all :) If there are further questions, don't be afraid to leave a comment to let me know and I'll try my best to answer them if I have the answers. In the future, I want an industrial piercing so maybe that will be the next piercing update hehe.
xoxo.
Labels: belly button, piercing, tips, tutorial
How I Contour My Face
Contouring is one of my favourite steps to do when applying makeup. Sometimes when you apply foundation on your face, it may look really flat, but contouring solves that problem! I contour my face 90% of the time when I apply my makeup, except for those super lazy days when I hardly apply any makeup at all. It makes the biggest difference to your face and you can even slim down your face shape a tiny bit!
Products used:
- NYX blush in Taupe (Contour)
- Rimmel blush in Pink Sorbet (Blush)
- Etude House Golden Ratio Contour Maker (Highlight)
- Real Techniques Contour Brush
- Tokidoki Blush Brush
- Small fluffy face brush (no brand, sorry!)
Here's my face without any contouring. It's pretty flat and my face looks super wide and round ;-; I've applied BB cream, concealer and powdered to set everything in place. Now I'm ready to start contouring.
First I start with my bronzer, or in this case, I use NYX's blush in Taupe. I like using this as a contour colour because it is not orange like most bronzers are and it's deep enough to mimic shadows on my face, which is what we're going for. Contour with a colour that suits your skin tone. Don't go for something too orange or warm if you're only looking to slim down your face, as a bronzer is only good for, well, bronzing your face. Also, make sure it's matte with no shimmers what so ever. Shadows aren't supposed to shimmer and the matte texture will look most natural when you take flash photography. Shimmers reflect light, and with contour, you want to create shadows.
When contouring the side of your face, go with the E 3 method, where you'd sculpt our these figures onto your face. I like to focus most of the product on the hallows of my cheeks, just under my cheek bones, and right along my jaw line to slim down my jaw. Then, with whatever is left, I buff some into my temples to slim down my the sides of my forehead.
Don't forget your nose. I find this to be the most important part to contour for my face because my nose isn't as slim as I'd like it to be. I apply some just on the sides of my nose to create a slimmer appearance.
Next, I apply my blush from Rimmel called Pink Sorbet. The colour of blush is really up to you and you can choose one suitable for the makeup look you're going for that day. This is my go-to blush because the colour is a subtle pinky-coral. Smile and apply it on the apples of your cheeks. I also like to drag it up and out to the side of my face to add a little further contouring.
Highlighting is also one of my favourite parts because it goes hand in hand with contouring. When you add shadows, you'll want to add some light as well. Apply your highlighter on any high points of your face. I always put some down the bridge of my nose to make my nose seem taller. Then I add some of the tops of my cheek bones and whatever is left goes on the center of my forehead and chin to create a more 3D illusion to my flat Asian face. Here I'm using Etude House's Golden Ratio Contour Maker, only taking the highlighter portion. I like to use highlighters with a pinky-white tone to them, but a lot of people also like using more warm, champagne highlighters to create a radiant glow. Don't apply too much because you don't want to look like a disco ball!
And now we're done! It's very subtle, but you can see that my face no longer looks washed out and dead, and it's slightly more slim than before. There isn't a huge difference because remember, you want to keep this natural. The key is to blend, blend, blend. But you can definitely do some really heavy contouring with more intense shades for things like face transformations and costumes, etc.
Anyway, I hope you found this somewhat helpful. Happy contouring, and enjoy the magic of makeup!
Labels: blush, contour, cosmetics, highlighter, makeup, tips, tutorial
"Queen B" Makeup Tutorial Using Kat Von D Spellbinding Eyeshadow Book
For my birthday, I received Kat Von D's Spellbinding Eyeshadow Book and I've been using it every day since I got it! I absolutely love the colours and they're all so pigmented. My favourite shades are "Queen", "Oddfellow", and "Wonderland", so I created this look using all those shadows. I hope you enjoy :)
(Click to enlarge)
Labels: kat von d, makeup, tips, tutorial
Tips on how to drink more water
I've never been the type of person that drank a lot of water. In fact, it was really common for me to just drink less than half a glass in the morning and run on that for the rest of the day. You could say I was quite dehydrated. It was always annoying when people nagged me to drink more water as I never felt all that thirsty or the need to drink water. But as time passed, I realized that I should try and force myself to drink more because as you know, water is good for you.
We all know the benefits of water and that it's good for our bodies to flush out toxins and what not. So how do you force yourself to drink more water if it's something that you struggle with, and how much should you drink?
People say that you're supposed to drink at least 8 glasses of water a day. I'm not quite sure how accurate that is, because I believe it's all relative to your body size. A person that's larger and/or taller would naturally require more water than a smaller person in comparison. For someone like me, I don't try to count the number of cups I drink, but rather just try and sip on water all throughout the day if possible. If you find yourself peeing a lot more than usual, you're doing it right :)
Here are some tips that helped me get more water into my system:
#1: Find a cute water bottle!
I know it may sound silly, but I think getting yourself a really cute or cool water bottle will motivate you to drink from it more often. You can carry it around with you everywhere, make it your best friend, and naturally you'll drink more often because it's always in your hands. When I got cups and bottles that I really liked, it made me feel like I wanted to use it more.
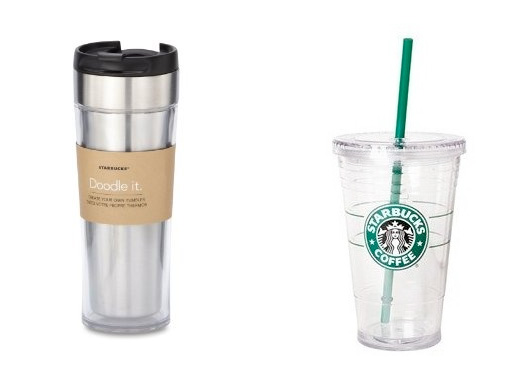
I have a reusable Starbucks cold cup tumbler for cold water and drinks, and a travel mug/tumbler for hot teas or coffee. Also, I have a
water bobble which has a mini filter that filters your water as you drink. It might seem useless to other people, but knowing you have a cool filter makes it seem that much more interesting while you drink your water. It's kind of a psychological thing, I guess. Also, if you can't find a water fountain or anything, you can just fill it with water from a tap and you won't have to worry about the water not being clean!
There are other cute bottles you can get like the ones from PINK by Victoria Secret. I've seen these bottles in real life and they are HUGE! You can hold lots and lots of water in them so you don't have to refill so often, and they're great for when you exercise or do sports. You could also get cute ones with your favourite Disney character. I like the design of the Tinkerbell one, but there are many other cute characters as well :)
#2: Straws, straws, straws
Don't you just love straws? If you don't, what's wrong with you? Nah, I'm just kidding. But really, straws are the best. They may seem really pointless and a waste, but having a straw makes sipping water that much more easy and you'll find yourself sipping more often than you would if you were drinking out of just a regular cup or mug. You don't even have to lift up your cup! Try and find reusable ones like the ones they sell at Starbucks for their tumblers, or fun and colourful curly straws.
#3: Ice ice baby
If you're like me, room temperature water is just plain gross. If that's the case, drinking cold icy water makes it that much more refreshing. I love ice in my water. It'll help you cool down in the hot summer days and it'll wake you right up if you find yourself falling asleep in the middle of class. There are many places that sell really cool ice trays that come in different designs and shapes if the regular cubes are too boring for you. I know Ikea sells some cute ones, or go to a novelty store and get ones like shark fins, super hero faces, animals, etc.
#4: Write it down. Make it a goal
If you are one of those people that rather keep track of how much you're really drinking, then keep a water journal! I remember back when I was a kid, my cousin would keep this mini notebook and every day she would write down how much cups she drank by drawing little water drop symbols. You could always just make a tiny little note in your daily planner each day if you don't want to keep a separate journal. Set a daily goal for yourself on how much water you want to drink today and achieve that goal. There are also apps you can get on your phone that will help remind and record how much you've drank.
#5: Lemons, teas, and other flavours
Many people dislike water because of the taste; or lack of. I personally don't mind plain water, but if you just can't stand it, try adding a few drops of lemon juice into your water. It's also good for you since you're adding a bit of vitamin C, right? Or try to drink water in tea form. I don't recommend drinking nothing but tea, but if you're just starting out, you can use tea to ease yourself into adding more water into your body. I suggest drinking teas that don't need milk or sugar because that's adding extra stuff that we don't want. Try to drink tea pure, so it's as similar to water as possible. Another method is getting flavour infusers. Many companies sell these and they can come in crystal form packets or concentrated drops.
#6: "Just water, thanks"
If you're at a restaurant, don't order any fancy drink. Just order plain or lemon water and drink that throughout your meal. You're already eating out, so why don't you do something a little more healthy and skip those sugary drinks.
#7: Don't sweat it.
And lastly, don't make it a chore. Drinking more water doesn't mean you have to drink nothing but water. From time to time, treat yourself to a little soda, or juice, or whatever it is that you enjoy drinking. The key here is to add water into that list of drinks, not let it completely take over. Also, don't stress about drinking 8 full glasses right away. To make it easier on yourself, take it slowly and add a cup more each day. Try and spread these cups throughout the whole day so you don't find yourself drinking it all at one concentrated time.
I hope these tips will help you get more water into your body this year! Water is really something that people don't seem to think about and most people aren't even aware that they're not drinking enough. It might be hard to start, but once you make it into a habit, you won't even have to think about it. Now, I find my body craves a lot more water rather than the regular carbonated drinks I love to drink so much. Do your body some good and drink that water!
*Disclaimer: none of these photos are mine and they've been taken from their rightful online websites. Labels: food, life, tips, water
Profile
stupid princess
 UserName:
 Hyokii
Age: 23
Birthday: January 22
Location: Toronto, Canada.
Sign: Aquarius Sun, Gemini Moon, Aries Rising
Who are you?
I'm just an average girl studying graphic design in my hometown Toronto. I'm nothing special but I like to blog and document my findings :) I'm really into astrology so come and tell me your sign!
What do you blog about?
Mostly just about my life and occasional beauty hauls and product reviews.
What does 'babo gongju' mean?
It's Korean for 'stupid princess'.
Boyfriend?
Yes! He does Muay Thai and he's a Virgo.
Tell me about your skin type!
I have extremely dry dehydrated skin and really dry/flaky lips. Light; yellow with neutral leaning cool undertone. Currently wearing NARS Sheer Glow in Gobi.
Up Coming
A List of posts that are coming soon
Reviews:
Tonymoly Cats Wink Smooth Primer
Etude House Goodbye Pore Ever Primer
Skin Food Choco Smoky Eye Palette
Aussie 3 Minute Miracle Shine Deep Treatment
Real Techniques Core Collection Brush Set
Etude House Golden Ratio Contour Maker
Skin Food Coffee Creamy Sheer Lipstick (PP701 Plum Wine)
Etude House Real Art Cleansing Oil (Moisture)
Skin Food Bath Salt (Peppermint)
Etude House Miss Tangerine Cream Choux Blusher
Skin Food Red Orange Makeup Finish (Matte Type)
Tonymoly Cat Chu Wink Tony Tint (Cherry Pink)
Etude House Etoinette Crystal Shine Lip Lipstick (PPK001 & PPK003)
Etude House Etoinette Brush Collection
The Face Shop Rice Water Bright Cleansing Special Set
The Face Shop Cotton Pads
The Face Shop Face It 07 Quick Top Coat
The Face Shop Lovely ME:EX Design My Eyebrow (01 Gray Brown)
The Face Shop Lovely ME:EX Style My Eyebrow (01 Gray Brown)
The Face Shop Face It Designing Cake Eyebrow (01 Khaki Grey)
Etude House Dear My Blooming Eyes (OR203 Mesmerizing Orange)
Nicole by O.P.I. Nail Polish (Iceberg Lotus)
The Face Shop Real Nature Mask Aloe Vera
The Face Shop Face It Styling Auto Gel Liner (01 Edgy Black)
The Face Shop Floral Water Mist
The Face Shop Mild Papaya Peeling Gel
Kat Von D Spellbinding Eyeshadow Book
Rimmel Lasting Finish Matte Lipstick By Kate Moss (111 Kiss Of Life)
Rimmel Lasting Finish Matte Lipstick By Kate Moss (102)
Sally Hansen Big Matte Top Coat
Witchcraft Mini+Cures Set
Maybelline Volum’ Express The Colossal Smoky Eyes Mascara
Nicole by O.P.I. Quick Dry Top Coat
Essence Kalinka Beauty 01 Babushka Me Lip Brush
Maybelline Volum’Express The Rocket Waterproof Mascara
Maybelline Eye Studio Master Drama Eyeliner in Midnight Master
Maybelline Fit Me Concealer in 10 Light
Maybelline Dream Lumi Touch Highlighting Concealer in Ivory
Etude House Nymph Aura Volumer (sample)
Etude House Mal;Gem All In One Emulsion (sample)
Etude House Mal;Gem Smoother Toner (sample)
Etude House Sun Prise Super Aqua SPF45/PA+++ (sample)
Etude House Precious Mineral BB Cream SPF30/PA++ (sample)
Etude House Moistfull Collagen Firming Eye Cream (sample)
Skin Food Platinum Grape Cell Essential BB Cream SPF45/PA+++ (sample)
Skin Food Agave Cactus Emulsion (sample)
The Face Shop Chia Seed Moisture-Holding Seed Cream(sample)
The Face Shop Mango Seed Silk Moisturizing Toner(sample)
The Face Shop Mango Seed Silk Moisturizing Lotion(sample)
Updated The Face Shop Mango Seed Silk Moisturizing Toner & Lotion (full size)
The Face Shop Mango Seed Silk Moisturizing Facial Butter(sample fullsize)
The Face Shop Volcanic Clay Black Head Aloe Nose Strip(sample)
The Face Shop Herb Day 365 Cleansing Foam Acerola (sample)
The Face Shop White Secret Whitening Body Essence (sample)
Tutorials & Tips:
How I Contour My Face
Tips On How To Drink More Water
2013 Summer/Fall Wish List
My Current Everyday Makeup Tutorial
Friends
Love'em, Hate'em
 Jin
Jin

Bucket List
before the end
. Put a lock on Seoul’s Namsan Tower's fence
.
Visit the beach; any beach (063011)
. Party hard
.
Starbucks date (072310)
. Learn to drive
.
Star gaze (062812)
.
Road trip (Summer`09)
.
Be loved
. Visit South Korea
.
Wedding; anyone's wedding (10.13.13)
.
Be happy
.
Bake cupcakes from scratch (04.06.10)
.
Ride a motorcycle (08.21.14)
. Get my first tattoo
.
Kiss in the rain
.
Pull an all nighter
.
Belly button piercing (02.19.14)
. Disney world/land
. Anime North
.
Cosplay Rin
. Cosplay X-23
.
Princess Cafe date (12.10.12)
.
VVIP album(02.20.11)
. Visit Hong Kong again
. Graduate university
. Paris
to be continued...